As a baking business owner, you’re juggling countless tasks every day – from perfecting recipes and decorating cookies to managing orders, responding to customer inquiries, and marketing your creations. What if I told you that artificial intelligence (AI) could help you work smarter, save time, and grow your business faster than ever before?
AI isn’t just for tech giants anymore. It’s become an accessible, practical tool that home bakers and small bakery owners can use right now to streamline operations, boost creativity, and reclaim precious time. Let’s explore how AI is transforming the baking business landscape and how you can start using it today.
Understanding AI for Small Baking Businesses
First, let’s demystify what AI actually means for your baking business. You don’t need to be a tech expert or have a big budget. AI tools today are user-friendly, affordable (often free), and designed to help small business owners like you automate repetitive tasks and make better decisions.
Think of AI as your digital assistant – one that never sleeps, doesn’t take vacations, and can handle multiple tasks simultaneously while you focus on what you do best: creating amazing baked goods.
1. Customer Service & Communication
The Challenge: Responding to customer inquiries about ingredients, pricing, availability, and custom orders can consume hours of your day.
The AI Solution: AI-powered chatbots and email assistants can handle common customer questions 24/7, freeing you to focus on complex custom orders and actual baking. Tools like ChatGPT, Claude, or specialized customer service platforms can draft professional responses to emails, answer FAQs on your website, and even help you create templates for common scenarios.
Real-world application: Use AI to draft responses to inquiry emails, create auto-responses for your booking system, or generate personalized thank-you messages for customers. You review and send – saving hours each week.
2. Content Creation & Marketing
The Challenge: Consistently creating engaging social media posts, blog content, and marketing materials while running your business.
The AI Solution: AI can help generate blog post ideas, write social media captions, create email newsletters, and even design graphics. Tools like ChatGPT for writing, DALL-E or Midjourney for images, and Canva’s AI features for design make content creation faster and easier.
Practical tips:
Use AI to brainstorm 30 days of social media post ideas in minutes
Generate multiple caption variations for the same photo and choose your favorite
Create blog posts about seasonal baking trends, tips, and tutorials
Design eye-catching graphics for promotions without hiring a designer
Write compelling product descriptions for your website or Etsy shop
3. Recipe Development & Documentation
The Challenge: Organizing recipes, scaling ingredients, calculating costs, and documenting your processes.
The AI Solution: AI can help you format recipes professionally, calculate ingredient costs, scale recipes up or down, and even suggest ingredient substitutions. You can also use AI to convert your handwritten or messy recipe notes into clean, shareable formats.
How to implement: Take a photo of your handwritten recipe, use AI image recognition to convert it to text, then ask AI to format it professionally with proper measurements, instructions, and even estimated prep/bake times.
4. Business Planning & Strategy
The Challenge: Making informed decisions about pricing, product offerings, marketing strategies, and business growth.
The AI Solution: AI can analyze your sales data, identify trends, suggest profitable product ideas, and help you create business plans. It can also help you research competitors, understand market demands, and develop pricing strategies.
Examples of AI assistance:
Analyze which products sell best during different seasons
Calculate profit margins and suggest optimal pricing
Create quarterly business plans and goal-setting frameworks
Research trending flavor combinations and design styles
Draft policies for cancellations, refunds, and custom orders
5. Design & Creative Inspiration
The Challenge: Coming up with fresh, creative designs for cookies, cakes, and other decorative baked goods.
The AI Solution: AI image generators can create design inspiration, mood boards, and even custom cookie cutter designs. You can describe what you want and AI will generate visual concepts to spark your creativity.
Creative uses: Generate color palette ideas for themed orders, visualize cake designs before starting, create custom cookie cutter concepts to 3D print, or develop unique piping patterns and techniques.
6. Administrative Tasks & Organization
The Challenge: Managing orders, tracking inventory, scheduling deliveries, and keeping financial records organized.
The AI Solution: AI can help create order tracking systems, generate invoices, organize your calendar, and even draft contracts or terms of service. Voice assistants can take notes during client consultations or help you create to-do lists hands-free while working.
Getting Started: Your AI Toolkit
Ready to incorporate AI into your baking business? Here’s a beginner-friendly toolkit to get you started:
Free AI Tools Every Baker Should Try:
ChatGPT or Claude (Free versions) – For writing, brainstorming, customer service, and general business tasks
Canva (Free AI features) – For creating graphics, social media posts, and marketing materials
Google Gemini – For research, content creation, and business planning
Grammarly (Free version) – For polishing your written communications
Remove.bg – For removing backgrounds from product photos
Best Practices: Using AI Effectively
While AI is powerful, it’s most effective when used thoughtfully. Here are some best practices:
Always review and personalize – AI-generated content should be a starting point, not the final product. Add your unique voice, expertise, and personality.
Protect customer privacy – Never input sensitive customer information (names, addresses, payment details) into AI tools.
Stay authentic – Use AI to enhance your work, not replace your creativity and expertise.
Learn the basics – Spend time understanding how to prompt AI effectively. The better your prompts, the better your results.
Test and iterate – Experiment with different tools and approaches to find what works best for your business.
Common Concerns Addressed
“Won’t AI replace human bakers?” No! AI is a tool to handle repetitive tasks, allowing you more time to focus on the creative, hands-on work that makes your baked goods special. Your artistry, expertise, and personal touch can never be replaced.
“Is it expensive?” Many powerful AI tools have free versions that are perfect for small businesses. You can start using AI today without any financial investment.
“Do I need to be tech-savvy?” Not at all! Today’s AI tools are designed to be user-friendly. If you can use a smartphone or computer, you can use AI.
Real Success Stories
Bakers around the world are already using AI to transform their businesses. Home bakers are using AI to write professional product descriptions that increase sales. Small bakeries are using AI chatbots to handle order inquiries during off-hours. Cookie decorators are using AI to generate design inspiration and create content for their social media channels.
The common thread? They’re all saving time, reducing stress, and growing their businesses while still maintaining the artisanal quality and personal touch that makes their work special.
Your Next Steps
Ready to harness the power of AI for your baking business? Start small:
Choose one area – Pick the biggest time-drain in your business (probably customer emails or social media)
Try one tool – Start with a free AI assistant like ChatGPT or Claude
Give it two weeks – Commit to using AI for this one task consistently
Measure the impact – Track how much time you’re saving
Expand gradually – Once you’re comfortable, add AI to other areas of your business
The Future is Here
AI is no longer a futuristic concept – it’s a practical business tool available to you right now. The bakers who embrace these technologies today will have more time for creativity, better work-life balance, and stronger, more profitable businesses tomorrow.
You don’t have to do it all yourself anymore. Let AI handle the repetitive tasks while you focus on what you love: creating beautiful, delicious baked goods that bring joy to your customers.
Want to learn more about growing your baking business? Check out our courses and tutorials at SweetTube Academy, where we share practical strategies, tools, and techniques to help you build a successful baking business – including how to effectively use technology and AI in your operations.
What AI tools are you curious about trying in your baking business? Share your thoughts in the comments below!
Most states don’t actually require business insurance for home businesses, but here’s the thing – where and how you sell can totally change the game!
For example, if you’re planning to set up a booth at the local craft fair or sell your gorgeous handmade items at a holiday market, many event coordinators will ask for proof of insurance before you can participate. It’s always smart to check both your state’s home business regulations and any venue requirements where you hope to showcase your amazing work.
Even if nobody’s making you get insurance, I’m here to tell you it’s one of the BEST investments you can make for your peace of mind! 🌟
I’ll be honest – I went without insurance for way too long (yikes!), but once I finally got coverage, it felt like this huge weight lifted off my shoulders. Plus, it’s way more affordable than you might think!
I ended up going with Hiscox Insurance for my creative business, and the whole process was done online in about 10 minutes. My annual premium? Just around $400!
Why Every Home Business Owner Should Consider Coverage
Here’s why I think every home business owner should seriously consider getting covered:
[/vc_column_text][/vc_column][/vc_row]
[vc_row css=”.vc_custom_benefit_section{padding-top: 20px !important; padding-bottom: 20px !important;}”][vc_column][vc_column_text]
😅
1. Oops Moments Happen
Let’s say you’re delivering custom invitations to a client’s home and accidentally knock over their expensive vase while setting up samples. Or maybe someone claims your homemade soap caused a skin reaction.
Life happens, and liability protection means you won’t be paying out of pocket for unexpected mishaps!
[/vc_column_text][/vc_column][/vc_row]
[vc_row css=”.vc_custom_benefit_section{padding-top: 20px !important; padding-bottom: 20px !important;}”][vc_column][vc_column_text]
🎨
2. Your Creative Space Matters
Picture this: a kitchen fire damages your craft room where you store all your Cricut supplies, vinyl, and that beautiful new heat press you just bought.
Property protection helps replace your business equipment and supplies so you can get back to creating without breaking the bank.
[/vc_column_text][/vc_column][/vc_row]
[vc_row css=”.vc_custom_benefit_section{padding-top: 20px !important; padding-bottom: 20px !important;}”][vc_column][vc_column_text]
🏠
3. When Life Interrupts Business
Imagine your basement craft studio floods right before the busy holiday season when you usually make 60% of your annual income.
Business interruption coverage can help replace that lost income while you’re getting your space back up and running.
[/vc_column_text][/vc_column][/vc_row]
[vc_row css=”.vc_custom_benefit_section{padding-top: 20px !important; padding-bottom: 20px !important;}”][vc_column][vc_column_text]
🔒
4. Protecting Your Hard Work
Unfortunately, some not-so-nice people target home businesses – stealing packages from porches, breaking into home studios, or even taking equipment from craft show setups.
Insurance helps you bounce back when theft tries to derail your dreams.
[/vc_column_text][/vc_column][/vc_row]
[vc_row css=”.vc_custom_benefit_section{padding-top: 20px !important; padding-bottom: 40px !important;}”][vc_column][vc_column_text]
😴
5. Sweet Dreams & Peace of Mind
Running a business is already stressful enough without worrying about “what ifs.” Having insurance lets you focus on what you love – creating amazing products and serving your customers – instead of losing sleep over potential problems.
Insurance is like giving yourself a safety net while you’re out there chasing your entrepreneurial dreams! 🎪
Getting insurance for your home business is like giving yourself a safety net while you’re out there chasing your entrepreneurial dreams! 🎪 It protects both your business assets AND your personal finances from unexpected curveballs.
My advice?
Chat with an insurance professional who understands small home businesses. They can help you figure out exactly what coverage makes sense for YOUR specific situation and budget.
Remember, investing in your business’s protection is just as important as investing in new equipment or marketing! You’ve got this, and insurance is just one more way to set yourself up for long-term success!
Have questions about business insurance or other aspects of running your home business? I love helping fellow entrepreneurs navigate this exciting journey!
✨ Your entrepreneurial journey matters • Let’s support each other • Success is sweeter when shared
Picture this: You’re known as the “cookie queen” among friends and family. Every potluck, every birthday party, every school event – people are practically begging you to bring your famous chocolate chip cookies or those incredible cinnamon rolls that disappear faster than you can say “batch number two.”
Sound familiar?
If you’ve ever thought, “Maybe I should actually sell these!” but then got overwhelmed by visions of complicated licenses, expensive commercial kitchens, and mountains of paperwork… I’ve got some seriously sweet news for you!
🌟 What Are Cottage Food Laws?
Think of cottage food laws as your state’s way of saying, “Hey, we know you make incredible food at home, and we want to help you share it with the world – safely and legally!” These special laws allow you to use your home kitchen, sell directly to customers, keep licensing simple, and start small while growing at your own pace.
Every state (well, almost every state!) has different rules, limits, and requirements. Here’s your complete guide to cottage food laws across America:
⚠️ Important Note: Laws change! Always verify current requirements with your state’s official cottage food program before starting your business. This guide provides general information based on recent data.
The cottage food world is waiting for what you create. Your community needs your special touch, your family recipes, your creative twists on classic favorites.
This information is for educational purposes only and should not be considered legal advice. Cottage food laws change regularly, and requirements vary by state and sometimes by local jurisdiction. Always verify current requirements with your state’s official cottage food program before starting your business.
When in doubt, contact your state’s department of agriculture, health department, or consult with a local attorney familiar with food business regulations.
Happy Baking (and Selling!),
Marcia ❤️
P.S. – If you found this helpful, share it with that friend who’s always talking about starting their food business “someday.” Today might just be their someday!
Pricing cakes profitably is one of the biggest challenges for bakers in 2026. Many talented bakers undercharge for their work, leading to burnout and financial stress.
The good news? Professional cake pricing doesn’t have to be complicated. With the right formula and tools, you can price confidently and build a profitable bakery business.
Why Traditional Methods Fail
In this comprehensive guide, we’ll cover everything you need to know about how to price cakes. You’ll learn the exact strategies used by successful bakers worldwide.
🚨 The Problem With Traditional Cake Pricing Methods
Most bakers rely on outdated pricing methods that leave money on the table. These approaches often lead to inconsistent pricing and customer confusion.
It’s time to upgrade to professional pricing strategies that actually work in 2025.
Take your pricing to the next level with these professional strategies. These techniques help established bakers maximize profits and attract premium clients.
These common questions help clarify professional cake pricing strategies. Understanding these concepts ensures consistent profitability in your baking business.
Q: How much should I charge per hour for cake decorating?
A: Professional bakers typically charge $15-$50 per hour depending on experience and market. Specialized techniques like fondant work or sugar flowers command higher rates. Start with your local minimum wage and increase as you gain experience and skills.
Q: What’s the average profit margin for custom cakes?
A: Successful bakeries maintain 30-50% profit margins on custom cakes. Wedding cakes and specialty designs can support higher margins due to their premium nature. Start with 30% and adjust based on your market and demand.
Q: How do I calculate ingredient costs accurately?
A: Break down each ingredient to cost per gram, ounce, or unit used. Use a kitchen scale for precise measurements and track wholesale prices monthly. Digital pricing tools automate this process and update costs automatically.
Q: Should I charge differently for pickup vs delivery?
A: Yes, always include delivery costs in your pricing structure. Calculate mileage, time, and gas expenses. Many bakers charge $0.50-$1.00 per mile plus a base delivery fee to cover time and vehicle wear.
Q: How do I handle customers who think my prices are too high?
A: Educate customers about the value and quality you provide. Show behind-the-scenes content and explain your process. Professional pricing attracts customers who value quality over low cost. Confident pricing reflects professional expertise.
Q: What overhead costs should I include in cake pricing?
A: Include utilities, equipment depreciation, packaging, business insurance, and marketing costs. Calculate overhead as 10-25% of your ingredient and labor costs. Don’t forget about licenses, permits, and professional development expenses.
Q: How often should I update my cake prices?
A: Review prices quarterly and adjust when ingredient costs change significantly. Annual price increases of 3-5% help offset inflation and business growth costs. Communicate changes to regular customers in advance with professional notifications.
Q: Can I use the same pricing formula for cupcakes and cookies?
A: Yes, the basic formula applies to all baked goods. However, factor in the additional labor for individual decoration and packaging. Consider minimum order quantities for smaller items to ensure profitability on time investment.
When I baked my first paid order out of my home kitchen in Beachwood, NJ, I had no idea what I was doing on the business side. I knew my cakes were good. I had no idea whether I was allowed to sell them from my house, whether I needed a permit, or whether I was charging enough to actually make any money.
Nobody handed me a roadmap. I figured it out the hard way — through hours of Google searches, a few phone calls to my county health department, and a lot of expensive mistakes on the pricing side.
This guide is the roadmap I wish I’d had.
It covers the four things every home baker needs to get in place before — or right as — they start taking paid orders: the legal foundation, the financial setup, the physical kitchen and equipment systems, and the basic marketing presence. I’ve updated everything for 2026, and I’ve replaced all the generic business advice with specifics that actually apply to cottage food businesses and home bakeries.
Work through it in phases. You don’t have to do everything at once. But by the time you finish all four phases, you’ll have a real business — not just a hobby that occasionally makes money.
Your 30-Day Home Bakery Launch Checklist
Here’s a quick overview of the four phases. Each one is broken down in detail below.
Phase 1 (Days 1–7): Legal foundation — cottage food laws, permits, business registration, labeling
Phase 2 (Days 8–14): Financial setup — pricing, separate bank account, expense tracking, tax basics
Phase 4 (Days 22–30): Marketing foundation — Instagram presence, custom cake page, order process
Let’s go through each one.
Phase 1: The Legal Foundation for Your Cottage Food Business (Days 1–7)
Understanding your state’s cottage food laws is the first step before taking any paid orders.
I know. Legal stuff is not why you got into baking. But this is the one area where skipping steps can actually cost you — not just fines or permit issues, but the stress of building something on a shaky foundation. Getting this right upfront takes less time than you think, and most of it comes down to understanding three things: what your state allows, what permits you need, and how to label your products correctly.
Step 1: Look Up Your State’s Cottage Food Laws
Cottage food laws are the state-level rules that determine what home bakers can legally produce and sell. They vary significantly from state to state. Some states are very permissive — they let you sell almost anything non-perishable, direct to consumers, with minimal registration. Others have strict sales caps, product restrictions, or require home kitchen inspections before you can take your first order.
Before you do anything else, you need to know what your state actually allows. Key questions to answer:
What foods are permitted under cottage food law in your state? (Usually shelf-stable baked goods — cookies, cakes, breads — but not products that require refrigeration)
Where can you legally sell? (Direct to consumer only? Farmers markets? Online with shipping?)
Is there an annual gross sales cap you can’t exceed?
Are home kitchen inspections required?
Do you need to register with your county health department or state agriculture department?
Step 2: Obtain the Permits and Licenses Your State Requires
Depending on your state and county, you may need one or more of the following:
Cottage food registration or permit — Many states require you to register with your local health department or county clerk. This is usually a simple form and a small fee (typically $25–$100). Some counties also conduct a brief home kitchen inspection to verify basic food safety compliance.
Food handler’s permit or food safety certification — Some states require at least one person in the business to hold a food handler’s card or complete a food safety course. ServSafe is the most widely accepted certification. Even where it’s not required, it’s worth having — it protects you and your customers.
Business license or DBA (“Doing Business As”) registration — If you’re selling under a business name (rather than your legal name), most counties require a DBA registration. This is also where you decide your business structure — sole proprietor is the simplest starting point for most home bakers.
Home occupation permit — Some municipalities require this if you’re running any business out of your home. Check with your local zoning office.
Don’t be intimidated by this list. For most home bakers, the full legal setup involves registering with one office, paying a small fee, and completing one or two short forms. Call your county health department — in my experience, they’re usually genuinely helpful to home food businesses.
Step 3: Understand Home Kitchen Inspection Requirements
Some states and counties require a home kitchen inspection before you can legally sell. This is not as scary as it sounds. Inspectors are typically checking that you have:
A clean, functional kitchen with working refrigeration and adequate handwashing facilities
Proper food storage (ingredients stored off the floor, away from cleaning products)
A pet-free cooking space during production (many states require this)
No signs of pest activity
Even if your state doesn’t require an inspection, it’s a good idea to run through this mental checklist before your first order. These are food safety basics that protect your customers — and you.
Step 4: Set Up Proper Product Labeling
Most cottage food states require every product you sell to carry a label. Required information typically includes:
A cottage food disclosure statement (exact wording varies by state, but it typically reads something like: “Made in a home kitchen not inspected by [state agency].”)
You can create professional-looking labels affordably using Canva. Start with a simple design and make it match your brand. Consistent packaging makes a real impression on customers.
☐ Scheduled or completed home kitchen inspection (if required)
☐ Created compliant product labels with all required information
Phase 2: Financial Setup for Your Home Bakery (Days 8–14)
Pricing your baked goods correctly from day one is one of the most important things you can do for long-term profitability.
The most common financial mistake I see home bakers make is undercharging — and I made it too. For the first year, I priced based on what “felt fair” or what I thought customers would pay. I had no idea whether I was actually making money after ingredient costs, my time, and overhead. Spoiler: I wasn’t, at least not on everything.
Getting your financial foundation right early saves you from having to raise prices dramatically later (which is awkward with existing customers) and from the slow burn of working hard without building anything financially meaningful.
Step 1: Open a Dedicated Business Checking Account
This is the single most important financial step you can take as a new home baker. Open a separate bank account for your baking business — one that only receives business income and only pays business expenses.
Why it matters:
At tax time, you’ll have a clean record of all income and expenses without sorting through personal transactions
It gives you a clearer picture of whether your business is actually profitable
It’s required for certain business structures (and strongly recommended for all of them)
It looks more professional if you’re accepting payments via Venmo Business, PayPal, or Square
You don’t need a fancy business account. Many online banks and credit unions offer free business checking. Just make sure it’s kept completely separate from your personal finances.
Step 2: Learn to Price Your Baked Goods Correctly
Pricing is the area where most home bakers struggle most — and where getting it wrong hurts the most. There’s a formula that works, and it’s not complicated once you understand it:
Ingredient cost: What did every ingredient in this specific product actually cost? Not a guess — actual per-recipe cost based on what you paid. This requires tracking what you buy and calculating your per-unit ingredient costs.
Packaging cost: Boxes, stickers, tissue paper, ribbon. These add up and need to be in your price.
Labor: Your time has value. Calculate how many hours a product takes from prep to delivery, and pay yourself a real hourly rate. Most experienced home bakers charge $15–$25/hour minimum for their labor.
Overhead: Your share of electricity, gas, oven wear, mixer wear, cleaning supplies. A simple way to start: add 10–15% on top of ingredient and labor costs.
Profit margin: The money that stays in the business after all costs. You need this to reinvest, cover slow months, and eventually grow.
If you’re doing this math manually in a spreadsheet, it works — but it takes time. Try the SweetTube Academy pricing calculator to run the numbers faster, or consider BatterSuite, which is built specifically for home and cottage food bakers and handles ingredient costing, recipe pricing, and order management in one place.
Step 3: Track Every Ingredient and Supply Purchase
From the day you open your business account, keep records of every purchase related to your baking business. This means:
Grocery runs for baking ingredients (keep receipts, or use a dedicated card)
Mileage for business-related driving (farmers market, supply runs)
These are all potential tax deductions. A shoebox of receipts works for a while, but you’ll save yourself a lot of stress at tax time if you use even a simple system — a spreadsheet with categories, or a tool like BatterSuite that logs expenses as you go.
Step 4: Understand Your Tax Obligations as a Home Baker
As a self-employed cottage food business owner, your tax situation is different from a W-2 employee. Key things to know:
Self-employment tax: You owe both the employer and employee portion of Social Security and Medicare taxes (currently 15.3% combined). This comes as a shock to many new business owners. Plan for it.
Quarterly estimated taxes: If you expect to owe more than $1,000 in taxes for the year, the IRS expects you to pay quarterly estimated taxes (due in April, June, September, and January). Your state likely has similar requirements.
Business expense deductions: The good news — all those legitimate business expenses you’re tracking reduce your taxable income. Ingredients, packaging, equipment, a portion of your home utility costs, business insurance, software — all potentially deductible.
Sales tax: Whether you need to collect and remit sales tax on baked goods depends on your state. Many states exempt basic food items but tax “luxury” items. Check your state’s rules.
Consult a tax professional or CPA who works with small businesses for your first year if you’re unsure. The cost is worth it.
Phase 2 Checklist
☐ Opened a dedicated business checking account
☐ Calculated actual ingredient costs for my core products
☐ Set prices using the full cost formula (ingredients + packaging + labor + overhead + profit)
☐ Set up a system for tracking income and expenses
☐ Understood my quarterly estimated tax obligations
☐ Checked my state’s sales tax rules for baked goods
Phase 3: Kitchen and Equipment Setup for a Home Bakery (Days 15–21)
A well-organized home kitchen workspace reduces stress, speeds up production, and supports food safety compliance.
Your home kitchen is your production facility. The more organized and efficient it is, the faster you work, the fewer mistakes you make, and the less burned out you feel after a busy weekend of orders. This phase is about setting up your workspace to support you — not fight you.
Step 1: Designate a Dedicated Baking Zone
If your kitchen can accommodate it, designate a specific area for baking production. This might be a countertop section, a kitchen island, or even a dedicated rolling cart. The goal is to have a workspace that’s:
Clear of personal clutter when you’re in production mode
Close to your key equipment (stand mixer, oven, refrigerator)
Easy to sanitize before and after each baking session
Even if your kitchen is small, having a mental and physical “baking zone” helps you shift into production mode and keeps your business separate from everyday home life.
Step 2: Get Your Food Safety Basics in Place
Regardless of what your state requires for inspections, these food safety practices are non-negotiable when you’re selling food to customers:
Handwashing: Wash hands thoroughly before every production session and after handling raw eggs, touching your face, or handling anything non-food-related.
Surface sanitation: Clean and sanitize all prep surfaces before use. Keep a spray bottle of food-safe sanitizer solution at your workstation.
Ingredient storage: Store all ingredients in sealed containers, off the floor, away from cleaning products. Label everything with purchase dates and “use by” dates.
Allergen separation: If you work with common allergens (nuts, gluten, dairy), have a system for preventing cross-contact when producing allergen-free items for customers who need them.
Pet separation: Keep pets out of the kitchen during all production. Most cottage food laws require this, and it’s a basic sanitation requirement regardless.
Temperature control: Products requiring refrigeration must be kept below 41°F until delivery. Use a refrigerator thermometer to verify.
Step 3: Build Your Equipment Inventory
You don’t need commercial-grade equipment to run a profitable home bakery — but you do need reliable equipment, and you need to know what you have, what it’s worth, and when it needs to be replaced or serviced.
Start by making a complete inventory of all equipment you use for your baking business:
Stand mixer (brand, model, purchase price, purchase date)
Oven — your regular home oven counts; note if it runs hot or cold
Scale (critical for accurate ingredient costing and recipe consistency)
Thermometers — oven thermometer, instant-read for sugar work
Why does this matter? Your equipment is a business asset. Tracking it properly lets you:
Claim depreciation on your taxes
Know when to budget for replacements
Calculate true overhead costs for your pricing
Have documentation for insurance purposes
If you’re managing multiple pieces of equipment and want a simple system to track them, IcingVault is designed specifically for home and cottage food bakers to log, track, and manage bakery equipment inventory without needing a spreadsheet or general-purpose inventory app.
Step 4: Set Up Production Systems
As your order volume grows, you need repeatable systems that let you produce consistently without reinventing the wheel every time. Start building these habits now:
Standardize your recipes: Write down every recipe in a consistent format with exact weights (grams, not cups — scales are more accurate). This is the only way to guarantee consistent results and accurate ingredient costing.
Create a production schedule template: Map out what needs to happen when for each type of order. Custom cakes often require baking 2 days before, ganache or crumb coat the day before, final decoration the morning of. Build this into your order intake process.
Build a standard ingredient order list: Know what you need to restock weekly and set a regular shopping schedule. Running out of powdered sugar the day before a big order is a preventable problem.
Phase 3 Checklist
☐ Designated a dedicated baking zone in my kitchen
☐ Set up food safety basics (sanitation supplies, allergen protocols, pet exclusion)
☐ Created a complete equipment inventory with purchase dates and values
☐ Standardized my core recipes by weight
☐ Created a basic production schedule template for my most common orders
☐ Established a regular ingredient restocking routine
Phase 4: Marketing Foundation for Your Home Bakery (Days 22–30)
Strong product photography and a consistent Instagram presence are the most effective marketing tools for most home bakers.
Marketing doesn’t have to be complicated or expensive when you’re starting out. Most home bakers get their first customers through word of mouth and Instagram — and those two channels can sustain a very healthy order volume if you do them well. This phase is about getting the basics in place so new customers can find you, understand what you do, and easily place an order.
Step 1: Set Up Your Instagram for Business
Instagram is still the most effective platform for most home and cottage food bakers. It’s visual, it’s where your customers spend time, and it allows you to build an audience without paying for advertising — at least in the early stages.
Getting set up right:
Switch to a Professional (Business) account: This gives you access to insights, the ability to add a contact button, and the option to run ads later.
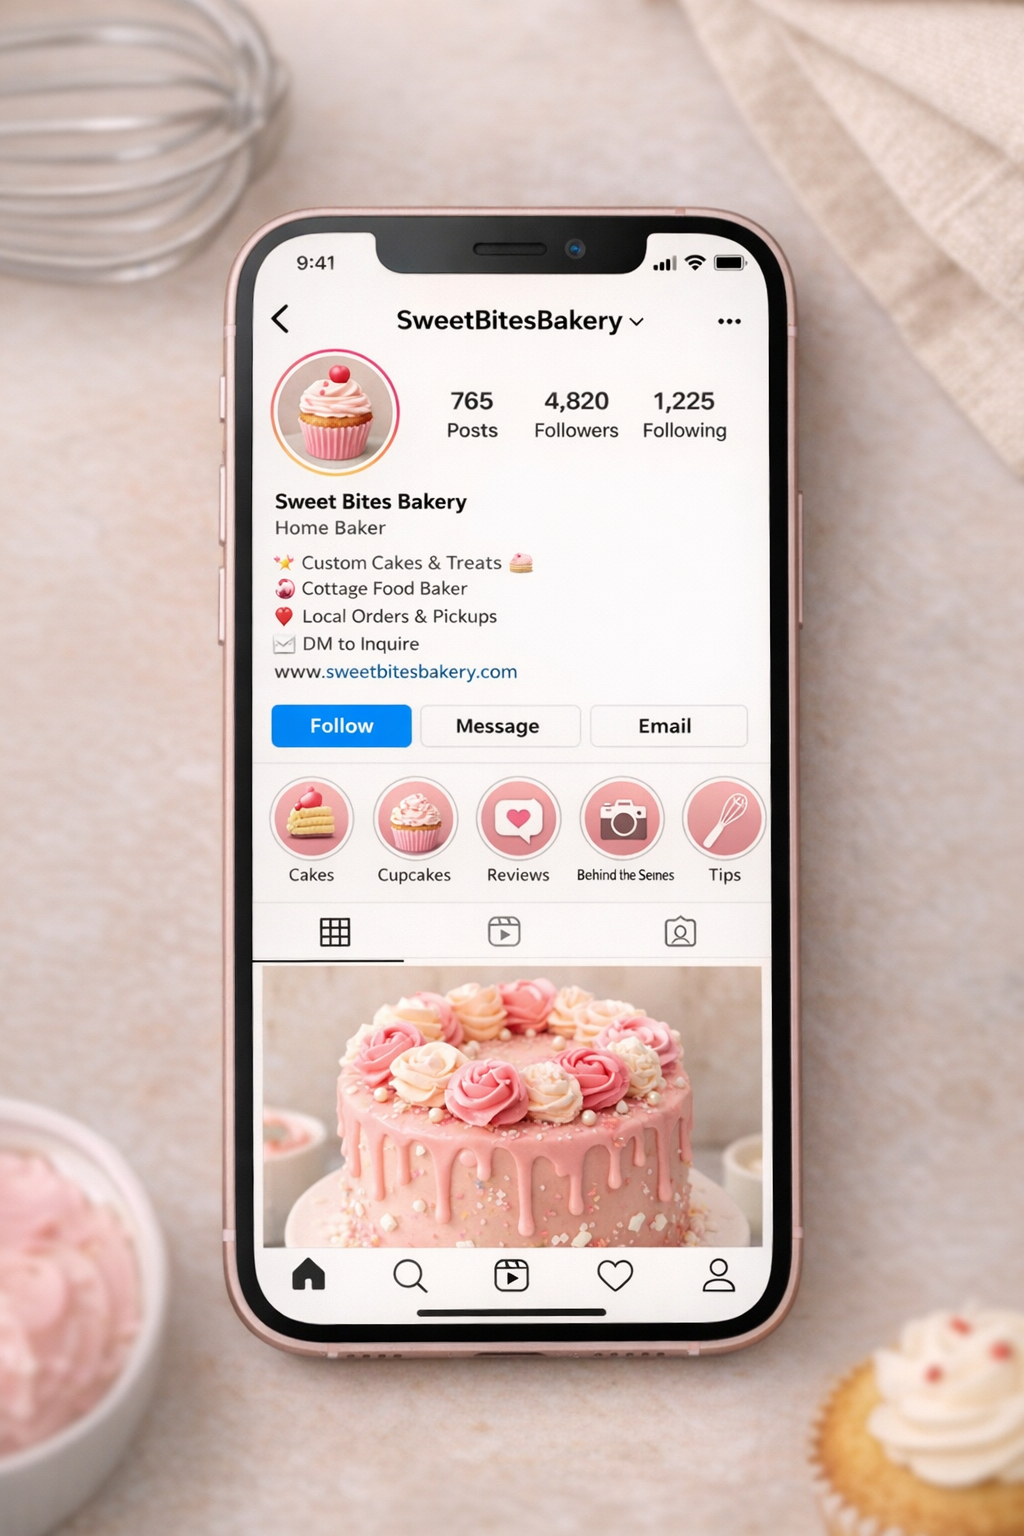
Write a clear bio: Tell people exactly what you do, where you’re located (city/area), and how to order. Example: “Custom cakes + baked goods | Beachwood, NJ | DM to order | Link below for order form”
Add a link to your order form or website: Don’t make customers hunt for how to reach you. Put your order form link or email directly in the bio.
Post your best work first: Your first 9–12 posts are your portfolio grid. Start with your strongest photos before posting anything else.
For photography: You don’t need a professional camera. Natural light + a clean, simple background (white marble contact paper on a table or cutting board works great) + your phone camera produces professional-looking photos. Consistency matters more than perfection.
Step 2: Create a Simple Product or Custom Cake Page
If you have a website (even a simple one on WordPress, Squarespace, or a free builder), create a dedicated page for your custom cake or signature product offerings. This page should include:
Your best product photos
What you offer (flavors, sizes, customization options)
Your general pricing or a price range (or a link to your pricing calculator/quote request form)
Your order lead time (how far in advance customers need to order)
Your service area (local pickup only? Delivery radius?)
A clear call to action — a link to your order form or contact page
If you don’t have a website yet, a well-organized Instagram profile with a link to a simple Google Form for order requests is enough to get started. Don’t let the absence of a website stop you from taking orders.
Step 3: Set Up an Order Intake System
Before you advertise, make sure you have a clear process for receiving and confirming orders. Nothing damages a new bakery’s reputation faster than communication chaos — missed orders, unclear expectations, last-minute surprises.
At minimum, your order intake process should capture:
Customer name and contact information
Product type, size, flavor, and any customization details
Delivery or pickup date and time
Delivery address (if applicable)
Allergen information (does the customer or anyone in their household have known allergies?)
Deposit amount and payment method
A Google Form that populates a spreadsheet is a perfectly functional starting point. For home bakers who want something purpose-built, BatterSuite includes order management with all of these fields built in, along with automatic cost calculations so you know your margin on every order.
Step 4: Collect and Display Reviews Early
Social proof matters enormously for home bakery marketing — especially when you’re new and potential customers don’t have a long track record to evaluate you on. For every order you complete in your first month:
Ask the customer for a photo of the product at the event or occasion
Follow up the day after delivery to ask if they were happy and request a Google review or a Facebook recommendation
Re-share customer photos on your Instagram (with permission)
Five genuine five-star Google reviews can do more for your business than a hundred Instagram followers. Ask for them early and often.
Step 5: Join the SweetTube Academy Community
Running a home bakery can feel isolating — especially in the early days when you’re figuring everything out. Connecting with other bakers who are in the same stage (or a few steps ahead) accelerates your learning and keeps you motivated.
Join the Sweet Academy community to connect with home and cottage food bakers, get feedback on pricing and marketing questions, and access the growing library of templates, guides, and tools — including everything covered in this post.
Phase 4 Checklist
☐ Set up Instagram Business profile with complete bio and order link
☐ Posted first 9–12 product photos
☐ Created a product or custom cake page on website (or a clear Instagram highlights section)
☐ Set up an order intake form with all required fields
☐ Established a deposit and payment policy
☐ Asked first customers for reviews and social sharing
☐ Joined the SweetTube Academy community
You Don’t Have to Figure This Out Alone
Starting a cottage food business is genuinely exciting — but it can also feel overwhelming when you’re staring at all the pieces at once. Legal requirements, pricing formulas, food safety protocols, Instagram strategy — it’s a lot to hold in your head.
Here’s what I want you to take away from this guide: you don’t have to do it all perfectly right away. Work through these four phases in order. Check off the items as you complete them. Build the foundation before you focus on the growth.
When I look back on my first year as a home baker, I don’t wish I’d baked better. I wish I’d run the business side more intentionally from the start. This guide is your chance to do exactly that.
If you’re like most small business owners, you probably use Canva for your graphics. But I bet you’re only scratching the surface of what this amazing tool can do. Today, I’m sharing 10 hidden Canva features that will completely transform your design game.
💡 Why These Features Matter: Most people stick to the basics – templates, text, and simple graphics. But these advanced features will help you create designs that look professionally made, save you hours of time, and make your brand stand out from the competition.
[/vc_column_text][/vc_column][/vc_row]
[vc_row css=”.vc_custom_feature_section{padding-top: 40px !important; padding-bottom: 20px !important;}”][vc_column][vc_column_text]
🎯 Hidden Feature #1: Brand Kit Magic Canva Pro Only
What it is: Your Brand Kit isn’t just for colors and fonts – it can store custom graphics, logos, and even animated elements.
How to use it:
Go to Brand Kit in your sidebar (Pro users only)
Upload ALL your brand elements (not just logo)
Add your secondary logos, icons, patterns
Save frequently used graphics here
Pro tip: Upload transparent PNG versions of your logos for maximum flexibility.
Note: Brand Kit is exclusively a Canva Pro feature – free users don’t have access to any Brand Kit functionality.
[/vc_column_text][/vc_column][/vc_row]
[vc_row css=”.vc_custom_feature_section{padding-top: 20px !important; padding-bottom: 20px !important;}”][vc_column][vc_column_text]
✨ Hidden Feature #2: Magic Resize (But Smarter) Canva Pro Only
What it is: Magic Resize doesn’t just change dimensions – it can optimize layouts for different platforms.
The secret trick:
Design your main post (Instagram square)
Use Magic Resize for Pinterest (vertical)
Check “Optimize Layout” – Canva repositions elements automatically
Make manual tweaks for each platform
⏰ Time saved: 15 minutes per design set
[/vc_column_text][/vc_column][/vc_row]
[vc_row css=”.vc_custom_feature_section{padding-top: 20px !important; padding-bottom: 20px !important;}”][vc_column][vc_column_text]
🎨 Hidden Feature #3: Automatic Color Palette from Photos
What it is: Canva now automatically extracts color palettes from any image you upload – no manual work needed!
How it works:
Upload any photo to your design
Click on any color picker in your design
Look for “Photo colors” section
Canva automatically shows you a perfect palette from your image
Click any color to apply it instantly
Perfect for: Matching your graphics to lifestyle photos, seasonal campaigns, or pulling colors from inspiration images
⏰ Time saved: No more guessing or manual color matching!
[/vc_column_text][/vc_column][/vc_row]
[vc_row css=”.vc_custom_feature_section{padding-top: 20px !important; padding-bottom: 20px !important;}”][vc_column][vc_column_text]
📐 Hidden Feature #4: Smart Guidelines & Spacing
What it is: Invisible helpers that make your designs perfectly aligned.
To activate:
Go to File → Settings
Turn on “Show rulers and guides”
Drag guidelines from rulers
Elements will “snap” to guidelines automatically
Professional result: Perfectly aligned text and graphics every time
[/vc_column_text][/vc_column][/vc_row]
[vc_row css=”.vc_custom_feature_section{padding-top: 20px !important; padding-bottom: 20px !important;}”][vc_column][vc_column_text]
🔄 Hidden Feature #5: Background Remover (Advanced) Canva Pro Only
What it is: Not just removing backgrounds – but replacing them strategically.
Advanced technique:
Remove background from product photo
Add subtle shadow using “Drop Shadow” effect
Place on branded background
Adjust shadow color to match lighting
Result: Professional product photos without expensive photography
[/vc_column_text][/vc_column][/vc_row]
[vc_row css=”.vc_custom_feature_section{padding-top: 20px !important; padding-bottom: 20px !important;}”][vc_column][vc_column_text]
📊 Hidden Feature #6: Chart & Graph Creator
What it is: Built-in data visualization tools most people never find.
Where to find it:
Search “chart” in elements
Choose from bar charts, pie charts, line graphs
Click chart → Edit data
Input your actual business data
Perfect for: Social media stats, business growth posts, infographics
[/vc_column_text][/vc_column][/vc_row]
[vc_row css=”.vc_custom_feature_section{padding-top: 20px !important; padding-bottom: 20px !important;}”][vc_column][vc_column_text]
🎭 Hidden Feature #7: Animation Sequencing Canva Pro Only
What it is: Control exactly when elements appear in animated designs.
How to master it:
Select animated template
Click “Animate” button
Choose “Custom” animation
Set different timing for each element
Preview and adjust
Pro tip: Start with text, then add graphics 0.5 seconds later for professional flow
[/vc_column_text][/vc_column][/vc_row]
[vc_row css=”.vc_custom_feature_section{padding-top: 20px !important; padding-bottom: 20px !important;}”][vc_column][vc_column_text]
🖼️ Hidden Feature #8: Frame Masking
What it is: Put images inside shapes for creative layouts.
Step by step:
Add a frame (search “frames”)
Drag your image into the frame
Double-click to adjust positioning
Use different frame shapes for variety
Creative uses: Team photos in circles, product shots in branded shapes
[/vc_column_text][/vc_column][/vc_row]
[vc_row css=”.vc_custom_feature_section{padding-top: 20px !important; padding-bottom: 20px !important;}”][vc_column][vc_column_text]
📝 Hidden Feature #9: Text Effects Library
What it is: Professional text treatments beyond basic fonts.
Hidden gems:
Search “text effects” in templates
Find editable text graphics
Replace text with your message
Customize colors to match brand
Includes: 3D text, outlined fonts, textured effects, gradient text
[/vc_column_text][/vc_column][/vc_row]
[vc_row css=”.vc_custom_feature_section{padding-top: 20px !important; padding-bottom: 40px !important;}”][vc_column][vc_column_text]
🎨 Hidden Feature #10: Custom Dimension Presets
What it is: Save your most-used custom sizes for instant access.
Set it up once:
Create custom design (File → Custom Size)
Save as template with dimensions in title
Star/favorite for quick access
Duplicate whenever needed
⏰ Time saver: Perfect for print materials, specific platform requirements
These powerful features require Canva Pro ($15/month) – they’re not available to free users. But here’s why it’s worth every penny for serious business owners:
Have you tried any of these features before? Which one are you most excited to test out? Drop a comment below and let me know – I love hearing about your creative breakthroughs!
Want more Canva secrets? Join our newsletter for weekly design tips that will transform your business graphics.