How to Calculate Your Overhead as a Home Baker: The Complete Mathematical Guide

March 2, 2026
by marciadex
Blog, , , ,

How to Calculate Your Overhead as a Home Baker

The Complete Mathematical Guide

Stop guessing at your costs and start pricing profitably with this step-by-step overhead calculation system


If you’ve ever looked at your monthly expenses and wondered “How much of this should I add to each cake?” – you’re not alone. Most home bakers struggle with overhead calculation, leading to underpriced products and burnt-out bank accounts.

The truth? Overhead calculation isn’t hard – it just requires the right formula.

In this guide, you’ll learn the exact mathematical method professional bakeries use to calculate overhead costs, adapted specifically for home-based operations. No guesswork, no complicated accounting software – just straightforward math that ensures every product you sell contributes to covering your business expenses.

What Exactly IS Overhead?

Overhead costs are all the expenses required to run your baking business that aren’t directly tied to a single product.

Think of it this way:

Direct costs: Flour, sugar, eggs for a specific cake

Overhead costs: Your oven’s electricity, business insurance, packaging supplies, website hosting, kitchen equipment depreciation

Overhead is real money leaving your pocket every month, and if you’re not factoring it into your prices, you’re subsidizing your business with your personal funds.


The Home Baker’s Overhead Calculation Formula

Step 1: List ALL Your Monthly Business Expenses

Create a comprehensive list of every expense your baking business generates each month. Be thorough – small expenses add up quickly.

Fixed Overhead (Same Every Month)

  • Business insurance
  • Website hosting
  • Business phone/internet portion
  • Software subscriptions
  • Business loan payments
  • Kitchen equipment lease/rental
  • Professional fees

Variable Overhead (Changes Each Month)

  • Electricity (baking portion)
  • Gas (baking portion)
  • Water (baking portion)
  • Packaging supplies
  • Labels and stickers
  • Business mileage/delivery
  • Marketing/advertising
  • Equipment maintenance
  • Cleaning supplies

Depreciation Formula

Annual Depreciation = (Purchase Price – Resale Value) ÷ Lifespan Years
Monthly Depreciation = Annual Depreciation ÷ 12

💡 Example:

Stand mixer: $500
Resale value: $100
Lifespan: 5 years
Annual: ($500-$100)÷5 = $80
Monthly: $80÷12 = $6.67/month

Step 2: Calculate Total Monthly Overhead

Business Insurance:           $75
Website & Email:              $30
Utilities:                    $85
Packaging:                    $120
Labels:                       $40
Depreciation:                 $25
Marketing:                    $50
Home Office:                  $180
Cleaning:                     $30
-----------------------------------
TOTAL MONTHLY OVERHEAD:       $635


Step 3: Calculate Overhead Per Product

Three methods depending on your business:

Method A: Per-Unit

Best for high-volume bakers

Overhead Per Unit = Total Monthly Overhead ÷ Units Sold

Example: $635 ÷ 80 items = $7.94 per item


Method B: Per-Hour

Best for custom products

Hourly Overhead = Monthly Overhead ÷ Hours Worked
Product Overhead = Hourly Rate × Hours for Product

$635 ÷ 60 hours = $10.58/hour
Simple cake (2 hrs): $21.16
Custom cake (8 hrs): $84.64


Method C: Percentage

Best for recipe-based

Overhead % = (Monthly Overhead ÷ Monthly Ingredients) × 100
Product Overhead = Ingredients × Overhead %

($635 ÷ $1,200) × 100 = 53%
Cake ($15 ingredients): $7.95 overhead
Cookies ($8 ingredients): $4.24 overhead

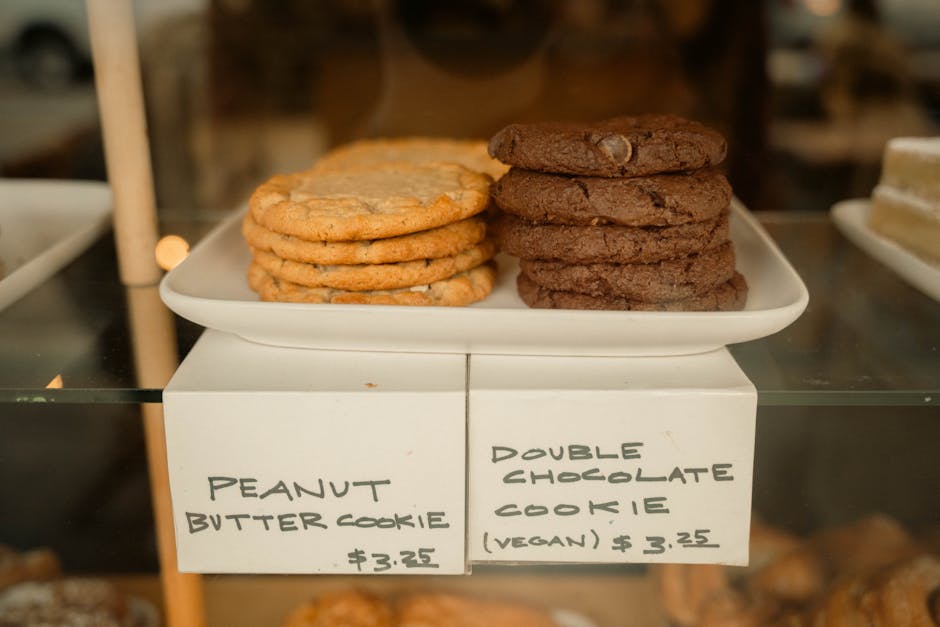
Special Case: Cookie Overhead & Pricing

Cookies require different overhead thinking than cakes because labor time varies dramatically based on decoration level. Let’s break down why custom cookies should cost $6+ each (and how to justify it).

⚠️ The Cookie Time Reality Check

Most bakers think cookies take 1 hour. They actually take 3+ hours for custom work.

Real Cookie Labor Breakdown (2 Dozen)

Mixing dough:                 20 minutes
Rolling & cutting:            30 minutes
Baking (2-3 batches):         40 minutes
Cooling time:                 15 minutes
Making royal icing:           20 minutes
Decorating 24 cookies:        60-90 minutes
Cleanup:                      15 minutes
━━━━━━━━━━━━━━━━━━━━━━━━━━━━━━━━━━━━━━
TOTAL LABOR TIME:             3-3.5 hours

This is for custom decorated cookies. Plain or simply decorated cookies take less time, but most customer orders fall into the custom category.

Cookie Pricing by Decoration Level

Tier 1: Plain/Minimal Cookies

Cut-out shapes, minimal decoration, basic sprinkles

Labor Time: 1 hour for 2 dozen

Ingredients:                  $7.00
Labor (1 hr @ $25):          $25.00
Overhead (1 hr @ $10.58):    $10.58
━━━━━━━━━━━━━━━━━━━━━━━━━━━━━━━━━
Subtotal:                    $42.58
Profit (30%):                $12.77
━━━━━━━━━━━━━━━━━━━━━━━━━━━━━━━━━
TOTAL: $55 for 2 dozen

Per Dozen: $27.50
Per Cookie: $2.29

Tier 2: Simply Decorated Cookies

Basic royal icing, simple designs, 2-3 colors

Labor Time: 1.5-2 hours for 2 dozen

Ingredients:                  $7.00
Labor (1.5 hrs @ $25):       $37.50
Overhead (1.5 hrs @ $10.58): $15.87
━━━━━━━━━━━━━━━━━━━━━━━━━━━━━━━━━
Subtotal:                    $60.37
Profit (30%):                $18.11
━━━━━━━━━━━━━━━━━━━━━━━━━━━━━━━━━
TOTAL: $78 for 2 dozen

Per Dozen: $39
Per Cookie: $3.25

Tier 3: Custom Decorated Cookies ⭐

Detailed royal icing, multiple colors, intricate designs, flooding & piping

Labor Time: 3-3.5 hours for 2 dozen

Ingredients:                  $7.00
Labor (3 hrs @ $25):         $75.00
Overhead (3 hrs @ $10.58):   $31.74
━━━━━━━━━━━━━━━━━━━━━━━━━━━━━━━━━
Subtotal:                   $113.74
Profit (30%):                $34.12
━━━━━━━━━━━━━━━━━━━━━━━━━━━━━━━━━
TOTAL: $148 for 2 dozen

Per Dozen: $74
Per Cookie: $6.17

✅ Market Reality: Custom decorated cookies from professional bakers typically sell for $4-10 per cookie. At $6.17, you’re competitively priced in the middle range.

Why Most Bakers Underprice Cookies

❌ The Wrong Math (What Most Bakers Do)

Ingredients: $7.00 × 3 = $21 for 2 dozen
Per dozen: $10.50
Per cookie: $0.88

This covers ONLY ingredients. No labor. No overhead. No profit.

✅ The Right Math (Professional Pricing)

Ingredients + Labor + Overhead + Profit = $148 for 2 dozen
Per dozen: $74
Per cookie: $6.17

This covers everything AND pays you properly for skilled work.

How to Justify $6+ Per Cookie Pricing

💬

1. Educate Your Customers

“Each cookie takes 7-10 minutes to hand-decorate with royal icing. That’s the same time an artist spends on a small painting. You’re not buying a cookie—you’re buying edible art.”

📸

2. Show Your Process

Post behind-the-scenes videos showing the 3+ hours of work. Time-lapse videos of decorating make customers understand the effort involved.

🎯

3. Target the Right Market

Focus on custom events (weddings, corporate, milestone birthdays) where customers value quality over price. Avoid competing with grocery store cookies.

🏆

4. Position as Premium

Use terms like “custom decorated,” “hand-piped,” “edible art,” “artisan cookies.” Professional branding, beautiful photos, and consistent quality justify premium prices.

📊

5. Offer Tiered Pricing

Give customers options: Simple decorated ($3.25), Standard custom ($4.50), Premium intricate ($6.17+). This shows value progression and lets budget-conscious customers self-select.

💡 Pro Tip: Minimum Order Requirements

Set a minimum of 1-2 dozen for custom cookies. Small orders (6 cookies) still take 2+ hours of work, which makes them unprofitable. Your time setting up, baking, and decorating is the same whether you make 6 or 24 cookies.

✅ The Bottom Line on Cookie Pricing

If you’re spending 3 hours decorating 2 dozen cookies and charging $40 ($1.67/cookie), you’re earning:

$40 – $7 ingredients = $33 ÷ 3 hours = $11/hour before overhead

You’re literally earning less than minimum wage. Charge what your skills, time, and business costs actually require: $6+ per custom cookie.


Step 4: Final Product Price

Price = Ingredients + Labor + Overhead + Profit

🎂 Complete Example:

Ingredients: $22.00
Labor (3hrs × $25): $75.00
Overhead (3hrs × $10.58): $31.74
Subtotal: $128.74
Profit (30%): $38.62
FINAL: $170

How BatterSuite Calculates Overhead for You

Manually tracking expenses is time-consuming. BatterSuite automates it all.

✅ Tracks all business expenses automatically
✅ Calculates equipment depreciation
✅ Updates overhead rates as expenses change
✅ Applies correct overhead to each product
✅ Shows exact costs including overhead

Quick Overhead for Cakes & Cookies

The SweetPrice Calculator WordPress plugin gives instant overhead-inclusive pricing for cakes and cookies.

✅ No more underpricing custom orders
✅ No manual calculations for quotes
✅ No guessing if you’re profitable
✅ Customers get instant accurate quotes


FAQ

Should I include my salary in overhead?

No. Labor is separate. Overhead is business expenses only.

What if overhead seems high?

Common for small-volume bakers. Increase sales to spread costs across more units.

How often recalculate?

Every 3-6 months or when major changes occur.

The Bottom Line

Calculating overhead isn’t optional – it’s the difference between profit and hobby.

Stop guessing. Start calculating. Price profitably.

Questions? Email support@sweettubeacademy.com

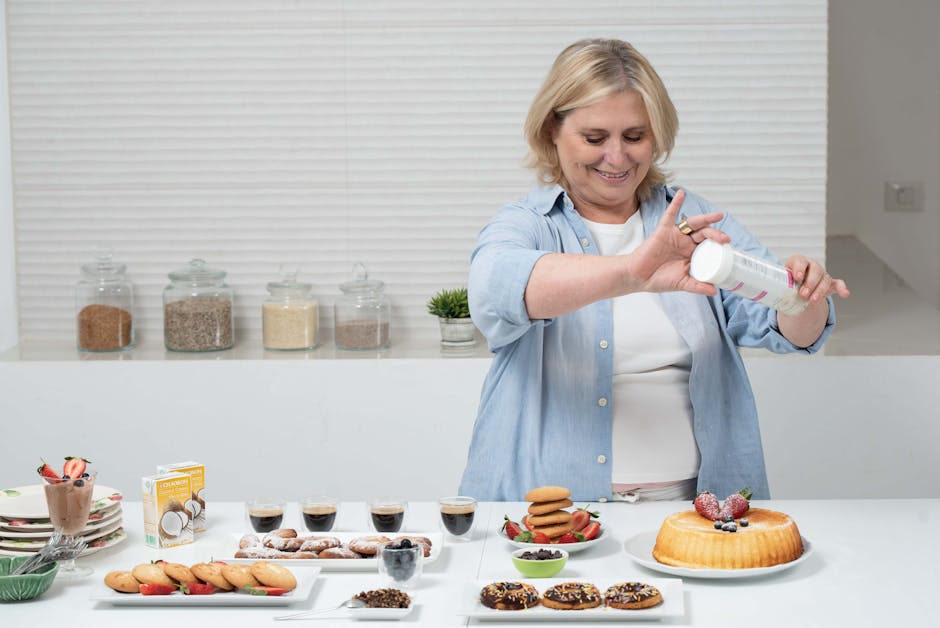
Marcia Rivera is the founder of SweetTube Academy and owner of Marcia’s Micro-Bakery in Beachwood, NJ. She’s been teaching home bakers profitable business practices since 2025.

[...]

How to Price Homemade Baked Goods: Real Questions From Home Bakers (And What to Do About It)

March 2, 2026
by marciadex
Blog, , , , , ,

If you’ve ever finished a big order, done the math, and felt your stomach drop — you already know the problem. Most home bakers are losing money without realizing it. Not because they’re bad at baking. Because they were never taught how to price homemade baked goods correctly.

Across Reddit threads, CakeCentral forums, and cottage food Facebook groups, the same questions come up every single week. We pulled the most common ones and answered them honestly — including what the math actually looks like and how home baker pricing software like BatterSuite takes the guesswork out of it.

Smiling home baker decorating a cake in her kitchen
Most home bakers undercharge — not because they want to, but because they don’t know their real costs. Photo by Ronit HaNegby / Pexels

Am I Undercharging? How to Calculate the Real Cost of Your Baked Goods

“I charge $1.50 per cupcake but my ingredients alone cost $0.50. Is that enough margin?” — CakeCentral forum

Your instinct to be suspicious is right. That $0.50 ingredient cost is only the beginning. Pricing homemade baked goods correctly means accounting for every real cost, not just flour and eggs:

  • Electricity to run your oven (roughly $0.10–$0.20 per hour depending on your utility rate)
  • Packaging — boxes, tissue paper, ribbon, labels, bags
  • Your time to shop, prep, bake, decorate, box, and deliver
  • Equipment depreciation (your mixer is wearing out with every batch)
  • Gas or mileage for delivery or supply runs

Add those up and that $1.50 cupcake might actually cost $1.75–$2.00 to produce. You’re not breaking even — you’re paying your customer to let you bake for them.

The formula that works: Cost of goods + labor + overhead + profit margin = your price. Anything less and you’re subsidizing someone else’s party.

What BatterSuite does: The recipe cost calculator tracks every ingredient down to the gram. Enter your bulk purchase price (a 5 lb bag of flour at $4.99) and BatterSuite calculates the exact cost per cup, per tablespoon — whatever unit your recipe uses. No spreadsheet math. No guessing.


How to Handle Customers Who Say Your Prices Are Too High

“A customer told me my prices were ‘way out of their price range.’ Should I lower them?”

Short answer: probably not.

Bakers who lower prices to match objections almost always regret it. Here’s why: customers who push hardest on price are usually not your customers. The right buyer for handmade, high-quality cottage food is not comparison-shopping against a grocery store sheet cake.

What the complaint is actually telling you: your marketing may not be reaching the right audience yet — not that your prices are wrong.

The deeper issue: most home bakers don’t know their actual cost. They guess. So when a customer pushes back, there’s a flash of self-doubt — “Maybe I am charging too much?” — when they have no way to confirm either way. That uncertainty is the real problem.

What BatterSuite does: When your price is built from real numbers — ingredients + labor + overhead + margin — you can stand behind it confidently. You’ll know exactly what you need to charge to be profitable, and you can stop second-guessing yourself every time someone balks at the price.

Home baker reviewing pricing documents and cost formulas at a desk
Knowing your exact costs transforms pricing from guesswork into confidence. Photo by Leeloo The First / Pexels

How to Calculate Your Hourly Rate as a Home Baker

“I spent 6 hours on a custom cake, charged $80, and realized I made $13/hour before expenses. How do I set a rate that actually makes sense?” — r/Baking

This is one of the most common questions in cottage food and side hustle communities — and one of the most important to get right. Here’s a starting framework for how to calculate your hourly rate as a home baker:

  1. Set your target income. What do you need or want to earn per month from baking?
  2. Estimate your real capacity. How many actual hours per week can you bake, prep, deliver, and run admin?
  3. Divide target by hours. That’s your minimum effective hourly rate.
  4. Layer in overhead. Supplies, insurance, packaging, marketing — these come out of every hour you work.

If your math says you need $35/hour but your local market supports $20/hour, that’s critical information. It means you may need to find higher-margin products, reduce input costs, or be honest about what this business can realistically earn right now.

What BatterSuite does: Set your labor rate once and it’s automatically factored into every recipe and quote. Change it anytime — everything updates instantly. You can also compare products side by side to see which ones are worth your time and which ones are costing you money.


How to Adjust Your Baked Goods Prices When Ingredient Costs Rise

“Egg prices went through the roof. How do I raise prices without losing my customers?”

This hit hard in 2025. Egg prices spiked over $5/dozen in many parts of the country due to widespread avian flu outbreaks — and bakers who hadn’t updated their pricing absorbed those losses themselves.

The business reality is simple: if your costs go up and your prices stay flat, your margin disappears. Every dollar in extra ingredient cost you absorb is a dollar less you’re paying yourself.

How successful home bakers handle ingredient price spikes:

  • Communicate transparently with regulars. A short note — “ingredient costs have increased, so I’ve adjusted my pricing slightly” — lands better than a silent price jump.
  • Price slightly above current cost. Build a small buffer so you’re not immediately underwater the next time something spikes.
  • Raise prices before you have to, not after. Reactive price increases feel larger and more urgent to both you and your customers.

What BatterSuite does: Update an ingredient cost once in your ingredient library and every recipe using that ingredient recalculates automatically. You’ll see immediately which products are now unprofitable and by exactly how much — without touching a single spreadsheet.

Overhead view of a pricing calculator and business cost documents on a desk
One ingredient price change should update everything — not send you back to the spreadsheet. Photo by Leeloo The First / Pexels

Why Home Bakers Break Even on Big Orders — and How to Stop It

“I just finished a huge holiday order and barely broke even. What did I miss?”

This is the post-mortem almost every home baker writes at some point. Big orders look profitable up front and feel devastating afterward. Here’s what almost always gets missed:

  • Shopping time — driving to three stores to find specialty sprinkles is unpaid time unless you price for it
  • Packaging — boxes, ribbon, tissue, labels, and bags add up fast on large orders
  • Utilities — 8 hours of oven use across a big holiday batch is a real line item
  • Custom design time — the hour you spent sketching the cake design before you ever touched flour
  • Admin time — emails, revisions, payment follow-ups, scheduling

Most bakers track ingredients well. Almost none track the full picture. And the full picture is where the profit lives.

What BatterSuite does: The overhead allocation feature lets you define your fixed and variable costs — utilities, average packaging, insurance, supplies — and BatterSuite distributes that overhead across orders automatically. You see your true margin before you take the order, not after you finish it.


How to Charge What Your Baked Goods Are Worth (Without the Guilt)

This question rarely gets posted publicly. It shows up in private Facebook groups and baker DMs: I feel guilty charging full price for something I love doing.

It’s real, and it’s common, and it quietly destroys more baking businesses than any pricing formula ever will.

A few reframes that have helped other home bakers:

  • Your skill took years to develop. You’re not charging for “just a cake.” You’re charging for everything you learned to make that cake possible.
  • Undercharging doesn’t signal humility — it devalues the craft for every baker in your community.
  • If you burn out making nothing, the thing you love becomes a source of stress instead of joy. Sustainable pricing protects the work, not just the business.

The bakers who thrive long-term learn to separate their emotional relationship with the work from the financial reality of running a business. Both can exist. They just can’t share the same spreadsheet cell.

Artisanal homemade cookies packaged in a bakery box ready for delivery
Your time, skill, and ingredients all have real value. Packaging it correctly starts with knowing your real costs. Photo by Natalia Olivera / Pexels

Home Baker Pricing Software: Managing Your Bakery Business as One Person

“Is there an easier way to manage all of this? I’m just one person.”

Yes — and it’s exactly why BatterSuite was built.

Most home bakers are running their business across a patchwork of Notes apps, Google Sheets, Instagram DMs, and mental math. It works — right up until it doesn’t. Until an order gets lost. Until you can’t remember what you charged a customer last year. Until tax season hits and you have no idea what your actual revenue was.

BatterSuite is home baker pricing software that brings everything into one place:

  • Recipe cost calculator — build your recipes, track every ingredient cost, see cost of goods instantly
  • Pricing tool — set your labor rate and profit margin, get a price that actually works for your business
  • Order management — track orders from inquiry to delivery, never lose a detail
  • Client records — every customer, every order, every conversation, organized in one place
  • Gift certificates — sell and redeem gift certificates built right in
  • Loyalty program — reward repeat customers automatically

At $22.99/month (or $199/year — less than $17/month), BatterSuite is built specifically for the scale of a cottage food or home bakery operation. Not a bloated restaurant POS. Not a generic invoicing tool. Something made for bakers, by people who understand how this business actually works.

Try BatterSuite Free for 30 Days →


The Bottom Line: Profitable Home Baking Starts with Real Numbers

The home bakers building sustainable businesses aren’t necessarily the most talented. They’re the ones who took pricing seriously, learned their real costs, and stopped guessing.

Every question above is the same question in a different shape: how do I know if I’m making money? And the answer is the same every time — you need real numbers to make real decisions. A gut feeling isn’t a pricing strategy.

BatterSuite gives you those numbers, automatically, so you can focus on the baking.

Start Your Free 30-Day Trial


Frequently Asked Questions About Home Baker Pricing

What is a good profit margin for a home bakery?

Most cottage food and home bakery businesses aim for a 30–50% profit margin after accounting for ingredients, labor, and overhead. Many bakers start far below this because they don’t include labor or overhead in their pricing at all. A recipe cost calculator helps you identify your true margin before you set a price.

How do I calculate the cost of a homemade cake?

Add up the cost of every ingredient (down to tablespoon-level precision), add packaging costs, calculate your time at your labor rate, and add a share of your monthly overhead (utilities, insurance, supplies). That total is your cost of goods. Your price should be your cost plus your desired profit margin.

Should I charge for my time as a home baker?

Yes — always. Your time is the most expensive ingredient in almost every recipe. Experienced bakers charge anywhere from $15 to $50+ per hour depending on skill level, local market, and product complexity. Many home bakers start undercounting their hours and gradually build toward a rate that reflects the real value of their work.

What’s the best software for home baker pricing?

BatterSuite is built specifically for home bakers and cottage food businesses. Unlike generic invoicing tools or restaurant POS systems, it’s designed around the way home bakers actually work — recipe-based costing, per-order pricing, client tracking, and order management in one place.

How do I handle ingredient price increases as a home baker?

Update your ingredient costs in your pricing tool as soon as prices change, then review which products are no longer hitting your margin target. It’s better to raise prices proactively with a brief note to regular customers than to wait until you’re losing money on every order.


Have a pricing question we didn’t cover? Drop it in the comments — we read every one.

Images sourced from Pexels (free to use). Photo credits: Ronit HaNegby, Leeloo The First, Natalia Olivera.

[...]

Stop Undercharging: Why Most Home Bakers Price Too Low (And How to Fix It)

February 17, 2026
by marciadex
Blog, , ,

Calculator and pricing documents on desk - business planning

You spent three hours decorating those cookies. You used premium ingredients. You poured your heart into every detail.

And then you charged $30 a dozen.

Sound familiar?

If you’ve ever looked at your bank account after a big order and wondered where all the profit went, you’re not alone. Most home bakers are undercharging — not because they don’t value their work, but because they genuinely don’t know what their products actually cost to make.

The Real Reason You’re Undercharging

It’s not lack of confidence (though that doesn’t help). It’s not imposter syndrome (though many of us deal with that too).

The real reason? You’re guessing.

You’re eyeballing ingredient costs. You’re not tracking your time. You’re forgetting about packaging, utilities, and all those “little” expenses that add up fast. You’re looking at what other bakers charge and hoping you’re in the right ballpark.

And when someone questions your price? You panic and lower it.

Display of cookies in bakery shop

What Actually Goes Into Pricing

Let’s talk about what you’re REALLY selling when someone orders a dozen custom cookies:

Ingredients: Butter, flour, sugar, food coloring, flavoring extracts — every single item has a cost, and it adds up faster than you think.

Time: Shopping for supplies, mixing dough, baking, cooling, decorating, boxing, communicating with the customer. That’s not just “a few hours” — that’s skilled labor that deserves to be compensated.

Overhead: Electricity to run your oven. Water for washing dishes. Packaging materials. Business insurance. Website hosting. These aren’t optional — they’re the cost of running a legitimate business.

Expertise: You didn’t learn to bake overnight. Your skills, your recipes, your ability to turn someone’s Pinterest dream into reality — that has VALUE.

The $45 Dozen That Actually Costs $52

Here’s a real example from my own bakery:

I was charging $45/dozen for simple decorated cookies. Seemed fair, right? Competitive with other local bakers. Customers weren’t complaining.

Then I actually calculated the costs:

  • Ingredients: $18.50
  • Packaging: $4.20
  • Labor (3 hours at $20/hr): $60
  • Overhead allocation: $6.30
  • Total actual cost: $89

I was losing $44 per order. And wondering why I was always stressed about money.

Sound familiar?

Pricing formula document with laptop and calculator

Why “Competitive Pricing” Is Keeping You Broke

Here’s what I see all the time in baker Facebook groups:

“What should I charge for a dozen cookies?”

And everyone chimes in with their prices. $25. $35. $40. Maybe $50 if you’re fancy.

But here’s the problem: their costs aren’t your costs.

Maybe they buy ingredients in massive bulk. Maybe they already own professional equipment. Maybe they’re not factoring in their time because they consider baking a “hobby.”

When you price based on what others charge instead of what YOU need to charge to be profitable, you’re building a business on quicksand.

The Confidence That Comes From Knowing Your Numbers

Everything changed when I started actually tracking my costs.

Not guessing. Not estimating. Actually calculating.

Suddenly, I could look a customer in the eye and say, “That’s $72 a dozen” without flinching. Because I knew exactly where that number came from. I knew my profit margin. I knew I wasn’t losing money.

And you know what? My sales didn’t drop. In fact, they increased.

Because confidence is attractive. When you know your worth, customers trust your pricing.

You Need a System, Not Just a Spreadsheet

I tried the Excel spreadsheet thing. I really did.

But here’s what happened: I’d update one ingredient cost and forget to update it in three different tabs. I’d lose track of which version was current. I’d spend 20 minutes hunting for the right file.

What I needed was a system that:

  • Calculated costs automatically
  • Updated everything when I changed one number
  • Was easy to access and actually USE
  • Didn’t require a degree in spreadsheets

So I built one. And now I’m giving it to you.

Introducing the Sweet Start Pricing Kit

This is the exact system I use in my own bakery to price every single product.

It’s a Notion template (don’t worry, Notion is free and super easy to use) that includes:

✅ Ingredient Cost Calculator
Track every ingredient you use, what you paid for it, and how much each recipe actually costs. No more guessing. No more “close enough.”

✅ Automatic Cost Calculations
Enter your ingredient amounts once, and the template does the math for you. Update a price, and everything recalculates instantly.

✅ Customizable Database
Add your own ingredients, your own recipes, your own costs. This isn’t a one-size-fits-all template — it’s designed to work for YOUR business.

Hands organizing business documents and pricing papers

What You’ll Be Able to Do

After you set up this pricing kit (takes about 15 minutes), you’ll be able to:

  • Calculate the exact cost of any recipe in seconds
  • Know your minimum price before you even talk to a customer
  • Adjust for ingredient price changes without panic
  • See which products are actually profitable (spoiler: it might not be what you think)
  • Quote prices with total confidence
  • Stop leaving money on the table

This Is Your Business. Treat It Like One.

You wouldn’t walk into Target and negotiate the price of milk, right?

So why are you letting customers negotiate YOUR prices?

It’s because you’re not sure. You don’t have the numbers to back you up. You’re afraid they’ll think you’re too expensive.

But here’s the truth: Professional businesses have professional prices.

And professional prices are based on actual costs, not guesswork and fear.

Ready to Stop Guessing and Start Profiting?

The Sweet Start Pricing Kit is completely free. No credit card. No catch. Just a genuine tool to help you run a more profitable bakery.

Because I’m tired of seeing talented bakers burn out because they can’t make the numbers work. I’m tired of watching incredible artists undervalue their work. I’m tired of the “race to the bottom” pricing that keeps all of us struggling.

You deserve to make money doing what you love.

Let’s make that happen.

Get Your Free Pricing Kit Now →

What happens next: Click the button above, enter your email, and you’ll instantly receive your Sweet Start Pricing Kit. It takes about 15 minutes to set up, and then you’ll have a pricing system you can use forever. No commitment. No upsells. Just a tool to help you charge what you’re worth.

See you on the other side of undercharging,

Marcia
Founder, SweetTube Academy
Owner, Marcia’s Micro-Bakery

P.S. — Still not sure? Reply to the welcome email after you download and tell me your biggest pricing struggle. I read every message and I’ll help you figure it out.

[...]

Complete Cricut Design Space Tutorial for Bakers: Create Labels, Toppers & Stickers

January 19, 2026
by marciadex
Tutorials

Stop Buying Expensive Bakery Decorations – Make Them Yourself!

If you’re a home baker or small bakery owner, you know how quickly costs add up when buying pre-made product labels, cake toppers, and custom stickers. What if I told you that you can create all three of these essential items yourself using tools you might already have?

In this comprehensive tutorial, I’m walking you through exactly how to use Cricut Design Space to create professional-quality product labels, glitter cardstock cake toppers, and custom stickers. Whether you’re just starting out or looking to level up your bakery packaging, this guide has everything you need.

What You’ll Learn in This Tutorial

  • Import Canva Labels to Cricut – Upload your custom designs and fit up to 4 labels per page
  • Create Glitter Cake Toppers – Design sturdy, professional toppers for cakes and cupcakes
  • Make Custom Stickers – Turn any image (including your logo!) into print-and-cut stickers

Project 1: Importing Product Labels from Canva to Cricut

One of the most common questions I get is: “Can I use my Canva designs with my Cricut?” The answer is absolutely yes! Here’s the complete process.

Step 1: Download Your Label from Canva

If you’ve already created labels in Canva (or followed my thermal printing label tutorial), you’ll want to download your design:

  • Open your label design in Canva
  • Click “Download”
  • Select PNG or JPG format
  • Download the file to your computer

Step 2: Set Up Your Cricut Design Space Canvas

Open Cricut Design Space and prepare your workspace:

  • Start with a blank canvas
  • Add a square shape
  • Resize to standard letter paper: 8.25″ x 11″
  • Change fill color to white (this is just a guide)

Step 3: Upload Your Label Image

Now comes the important part – uploading your design correctly:

  • Click “Upload” in the left panel
  • Select “Upload Image”
  • Click “Browse” and find your downloaded label
  • Click “Continue”
  • Preview your image and click “Apply and Continue”

Step 4: Choose “Flat Graphic Single Layer” (This is Critical!)

When asked to choose your image type, you have options:

  • Multi-layer – Creates a grainy, separated version
  • Flat graphic single layer – Creates a perfect, clean label (THIS IS WHAT YOU WANT!)

Select “Flat graphic single layer” and click “Continue.” This imports your label as one clean, printable image.

Step 5: Resize and Duplicate for Efficiency

Here’s where you save money by maximizing your materials:

  • Resize your first label to your desired size (I use 3″ x 4.5″)
  • Duplicate the label
  • Position to fit 4 labels on one page
  • Align them properly using the alignment tools

Pro tip: Four 3″ x 4.5″ labels fit perfectly on a standard letter-size page!

Step 6: Delete the White Background

Remember that white rectangle guide we created? Delete it now – you only needed it for positioning. Your labels are ready to print!

Step 7: Understanding Registration Marks

When you send your design to print, you’ll notice small corner marks appear on the preview. These aren’t mistakes – they’re registration marks that your Cricut needs to cut accurately. Here’s the workflow:

  1. Send to your regular printer (the one that prints in color)
  2. Let it print with the registration marks
  3. Place the printed sheet on your Cricut mat
  4. Send to Cricut to cut around each label

Project 2: Creating Glitter Cardstock Cake Toppers

Custom cake toppers can cost $15-30 to buy, but you can make your own for pennies! Here’s how to create professional, sturdy toppers that won’t fall apart.

Step 1: Add Text to Your Canvas

  • Click “Text” in the left panel
  • Type your first word (example: “Happy”)
  • Duplicate and add your second word (example: “Birthday”)

Step 2: Choose Your Font

Font selection is crucial for toppers:

  • Click on your text
  • Select “Font” from the top menu
  • Filter by “Free” or “System” fonts
  • Choose decorative, script fonts that connect well

Important: Many Cricut fonts require payment. Use “System” fonts to access the fonts already installed on your computer for free!

Step 3: The Secret to Sturdy Toppers – Make Letters Touch!

This is the most important tip for cake toppers that don’t break:

You want letters to touch in as many places as possible.

Why? When letters connect, they create a sturdy, single piece that won’t fall apart when you attach it to a dowel or stick.

  • Adjust letter spacing to make them overlap
  • Rotate letters slightly if needed to create touch points
  • Pay special attention to the dot over “i” – it must connect!

Step 4: Fill Gaps with Shapes

Sometimes letters have open spaces (like the bottom of a “B”). To fix this:

  • Go to “Shapes”
  • Select an oval or circle
  • Resize and position to fill the gap
  • Make sure it connects to both sides

Step 5: Weld Everything Into One Piece

This is the magic button that makes it all work:

  • Select ALL elements (all letters, shapes, dots)
  • Click “Weld” in the bottom right
  • Everything becomes one solid piece

Now your Cricut will cut it as a single, sturdy topper!

Step 6: Add an Outline (Optional but Professional)

Want that professional outlined look like you see on fancy toppers?

  • Select your welded topper
  • Go to “Edit” → “Effects” → “Offset”
  • Adjust the offset width
  • Change the outline color (white, black, or coordinating color)

This creates a two-layer topper: the background outline and the glitter top layer that you’ll glue together.

Step 7: Size for Your Cake

  • For a 6-inch cake: Make topper about 5 inches wide
  • For cupcakes: 2-3 inches wide
  • For larger cakes: Scale up proportionally

Materials for Toppers

  • Glitter cardstock (if you like glitter – I personally don’t!)
  • Regular cardstock in any color
  • Toothpicks, lollipop sticks, or cake dowels
  • Glue to attach layers

Project 3: Making Custom Stickers from Any Image

Whether you want to create stickers of your logo, decorative elements, or fun images, this process works for everything.

Step 1: Import Your Image

  • Click “Images” in the left panel
  • Upload your own image OR use Cricut’s library
  • Select your image and add to canvas

You can use:

  • Your bakery logo
  • Custom illustrations
  • Cricut library images (if you have them)
  • Any PNG or JPG image

Step 2: Create the Sticker Outline – Two Methods

Method 1: Cricut Access Subscription (Paid)

  • Select your image
  • Click “Edit”
  • Select “Sticker”
  • Automatic outline is created

Method 2: Offset Tool (FREE Alternative!)

Don’t have a subscription? No problem! Here’s how to get the same result for free:

  • Select your image
  • Click “Edit” → “Offset”
  • Adjust the width of the offset (this is your sticker border)
  • Change the offset color (usually white works best)

Step 3: Flatten (Don’t Weld!)

This is crucial – many people get confused here:

  • Weld = Combines shapes into one solid piece (for cutting only)
  • Flatten = Layers image on background for print-then-cut

For stickers, you want to:

  • Select both the image and the outline
  • Click “Flatten” in the layers panel

This tells Cricut: “Print this image on the background, THEN cut around it.”

Step 4: Send to Print and Cut

  • Click “Make It”
  • Send to your printer first
  • Wait for it to print (with registration marks)
  • Place on Cricut mat
  • Select your material (sticker paper)
  • Let Cricut cut around the outline

Sticker Paper Options

  • White sticker paper – Best for most designs
  • Clear sticker paper – For transparent backgrounds
  • Glossy or matte finish – Personal preference

Common Questions & Troubleshooting

Q: My labels aren’t cutting in the right place. What’s wrong?

A: Make sure your printer didn’t scale the image. In print settings, select “Actual Size” or “100%” – never “Fit to Page.”

Q: Can I use Cricut without a subscription?

A: Absolutely! While Cricut Access gives you extra fonts and images, all the essential tools (upload, text, shapes, offset) are completely free.

Q: My topper keeps breaking. What am I doing wrong?

A: Make sure letters are touching in multiple places before welding. Also, avoid very thin, delicate fonts – choose thicker, more connected styles.

Q: What’s the difference between Print then Cut and regular cutting?

A: Regular cutting cuts through solid colored cardstock. Print then Cut prints your design first, then cuts around it – perfect for full-color labels and stickers.

Q: How many labels/stickers can I make per sheet?

A: It depends on size, but generally:

  • 4 large labels (3″ x 4.5″) per sheet
  • 6-9 medium stickers (2″ x 3″) per sheet
  • 12+ small stickers (1″ x 1″) per sheet

Cost Savings Breakdown

Let’s look at what you save by making these yourself:

Product Labels:

  • Buying pre-cut: $15-25 per 100 labels
  • Making yourself: $5-8 per 100 labels (paper + ink)
  • Savings: $10-17 per 100 labels

Cake Toppers:

  • Buying custom: $15-30 per topper
  • Making yourself: $0.50-1.50 per topper (cardstock + stick)
  • Savings: $13.50-28.50 per topper

Custom Stickers:

  • Buying custom: $25-50 per 100 stickers
  • Making yourself: $8-12 per 100 stickers (sticker paper + ink)
  • Savings: $17-42 per 100 stickers

If you make even 10 cake toppers per month, you save $200-280 monthly!

What You Need to Get Started

Essential Equipment:

  • Cricut machine (Maker, Explore, or Joy)
  • Computer with Cricut Design Space installed
  • Regular inkjet or laser printer
  • Cutting mat

Materials:

  • Cardstock (white or colored)
  • Glitter cardstock (optional, for toppers)
  • Sticker paper (white or clear)
  • Regular printer paper (for labels)

Software (All Free!):

  • Cricut Design Space
  • Canva (for designing labels)


Next Steps: Building Your Bakery Toolkit

This Cricut tutorial pairs perfectly with my thermal printing tutorial. Together, these two tools give you a complete bakery packaging system:

  • Thermal printer – For ingredient labels and shipping labels
  • Cricut – For product labels, cake toppers, and stickers

Check out my thermal printing tutorial if you haven’t already – it’s another game-changer for home bakeries!

Your Turn!

Which project are you most excited to try? Are you making:

  • Product labels for your packaging?
  • Glitter toppers for special occasion cakes?
  • Custom stickers with your logo?

Drop a comment below and let me know! I love hearing what you’re creating.

And if you make something using this tutorial, tag me on Instagram @sweettubeacademy – I feature student work in my stories!

Join the SweetTube Community

Learning to use tools like Cricut is so much easier when you have support! Join our community:

  • YouTube – Subscribe for weekly tutorials
  • Instagram – @sweettubeacademy for daily tips
  • Facebook Group – Connect with other bakers
  • Email Newsletter – Get tutorials delivered to your inbox

Final Thoughts

When I first started my bakery, I bought everything pre-made. Labels, toppers, stickers – it all added up fast. Learning to use my Cricut was one of the best investments I made in my business.

Not only did it save me hundreds of dollars per month, but it gave me creative freedom. I can now create custom designs for every order without waiting for suppliers or paying premium prices.

If you have a Cricut sitting in your craft room, it’s time to put it to work for your bakery business. And if you don’t have one yet, these three projects alone will pay for the machine within a few months.

Remember: Every professional baker started exactly where you are now. We’re building our businesses together, one tool at a time.

Thanks for learning with me!

Marcia
SweetTube Academy

P.S. – Have questions about any step in this tutorial? Drop a comment below or email me at support@sweettubeacademy.com. I read and respond to every message!

Watch the Full Video Tutorial

This blog post covers all three projects, but if you want to see the step-by-step process in action, watch my complete 23-minute video tutorial on YouTube. I walk through every click, every button, and show you exactly what your screen should look like at each step.

[...]

Master Holiday Cake Decorating: Your Complete Guide to Festive Baking Success

November 14, 2025
by marciadex
Holiday Baking, Tutorials, ,

Learn professional holiday cake decorating techniques with SweetTube Academy. Master festive designs, buttercream techniques, piping skills, fondant work, and color theory for Christmas, Hanukkah, and winter cakes. Includes trending 2025 designs, essential tools, troubleshooting tips, and membership options ($5-$9/month). Transform your holiday baking!

[...]