♡ Free Resource: Get the Sweet Start Pricing Kit and start charging with confidence today! Get the Free Kit
Start Here

SweetTube Academy

Tag: baking business

Home baking business advice

  • Do You Actually Know What Baking Tools You Own? (Most of Us Don’t)

    Let me ask you something kind of embarrassing: how many cookie cutters do you own right now? Not a rough guess — the actual number. Do you know every mold in your collection? Every specialty pan you bought for that one order and then shoved in a bin somewhere?

    Yeah. Me neither. Or at least, I didn’t for a long time.

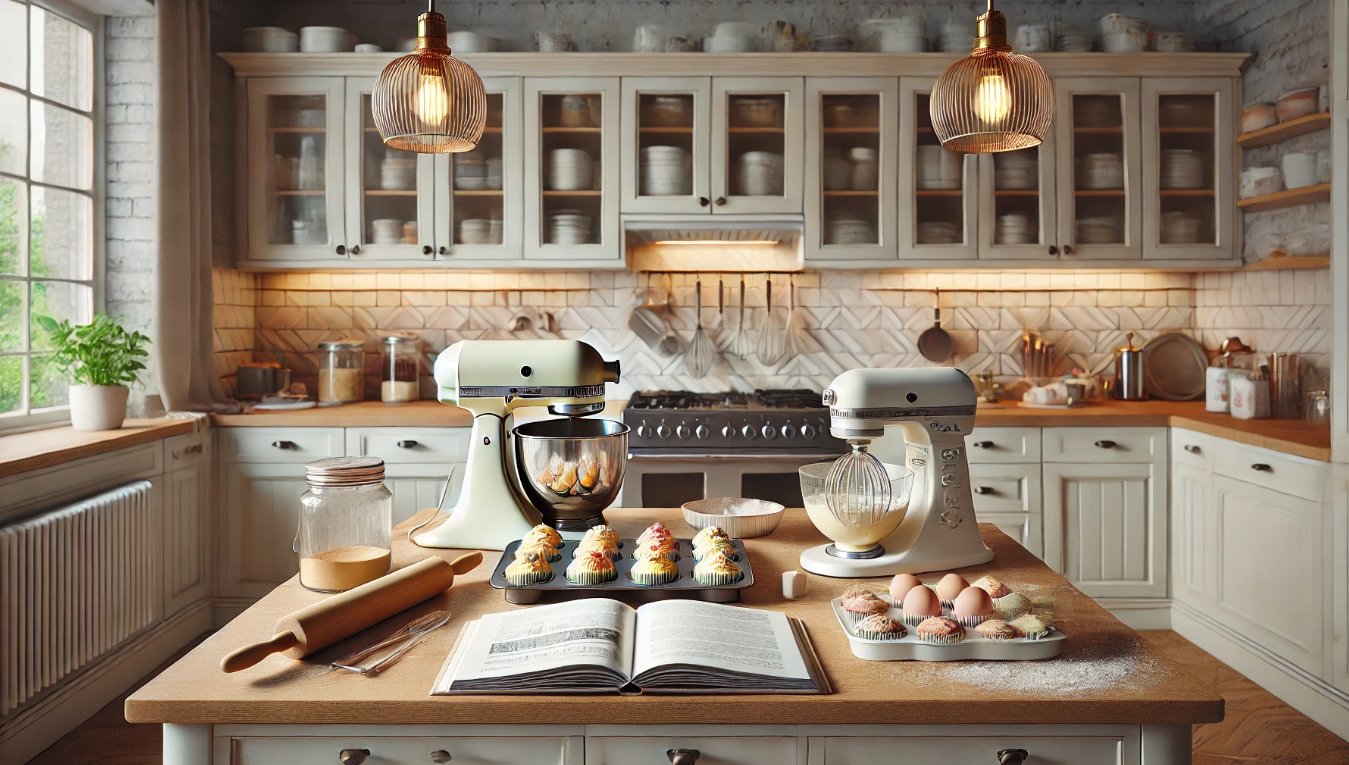
    If you’ve been baking for more than a year or two, you’ve probably hit that wall where your tools start multiplying faster than you can keep track of them. A cutter set here, a silicone mold there, a specialty cake pan from that one sale you couldn’t resist. Before you know it, you’re digging through bins trying to find the thing you know you have but cannot locate.

    And here’s the part nobody talks about: that disorganization costs you real money.

    The Problem Is More Common Than You Think

    I was browsing CakeCentral forums (a rabbit hole I do not recommend at 10pm) and found a thread about organizing cookie cutters that had bakers describing their collections in the hundreds — one person mentioned having over 3,000 cutters. Three thousand. And the consensus in that thread? Almost everyone had bought duplicates by accident because they simply didn’t know what they already had.

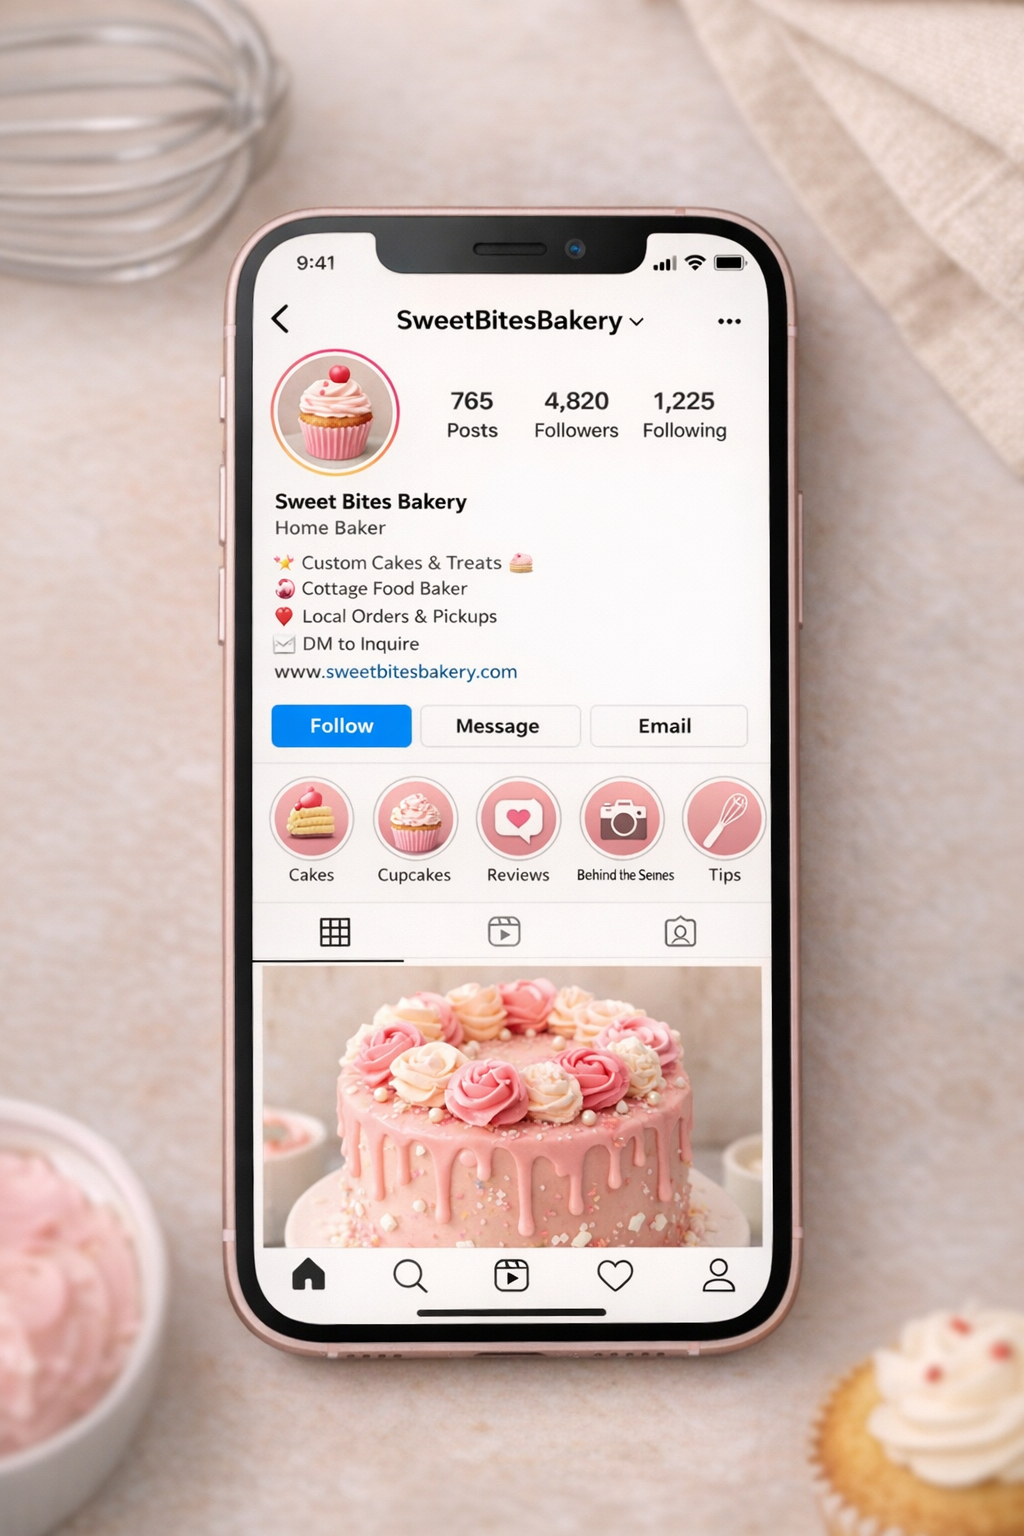
    One baker put it perfectly: she kept a list on her computer and wanted to add photos someday because when she’s talking to a customer, she needs to know exactly what shapes she can offer — fast. Another said she kept her inventory on a Palm Pilot (a Palm Pilot!) so she wouldn’t duplicate when she was out shopping.

    These are resourceful people doing their best with whatever tools they have. But the underlying problem hasn’t changed in twenty years: there’s no good dedicated solution for tracking what baking equipment you actually own.

    What Happens When You Don’t Track Your Tools

    Here’s what the chaos actually looks like in practice — and I’ve lived most of these:

    You buy duplicates. You’re at a craft store, you see a snowflake cutter, you think “I might have this but I’m not sure,” and you buy it anyway. Three dollars becomes thirty when it happens ten times a season.

    You tell customers you can’t do something — when you actually can. A customer asks if you have a specific shape and you say no because you don’t remember that you bought it eighteen months ago. That’s a missed opportunity and a less-than-confident impression.

    You waste time hunting instead of baking. Twenty minutes before you’re supposed to start an order is not the time to discover you can’t find the pan you needed. But that’s exactly when it happens.

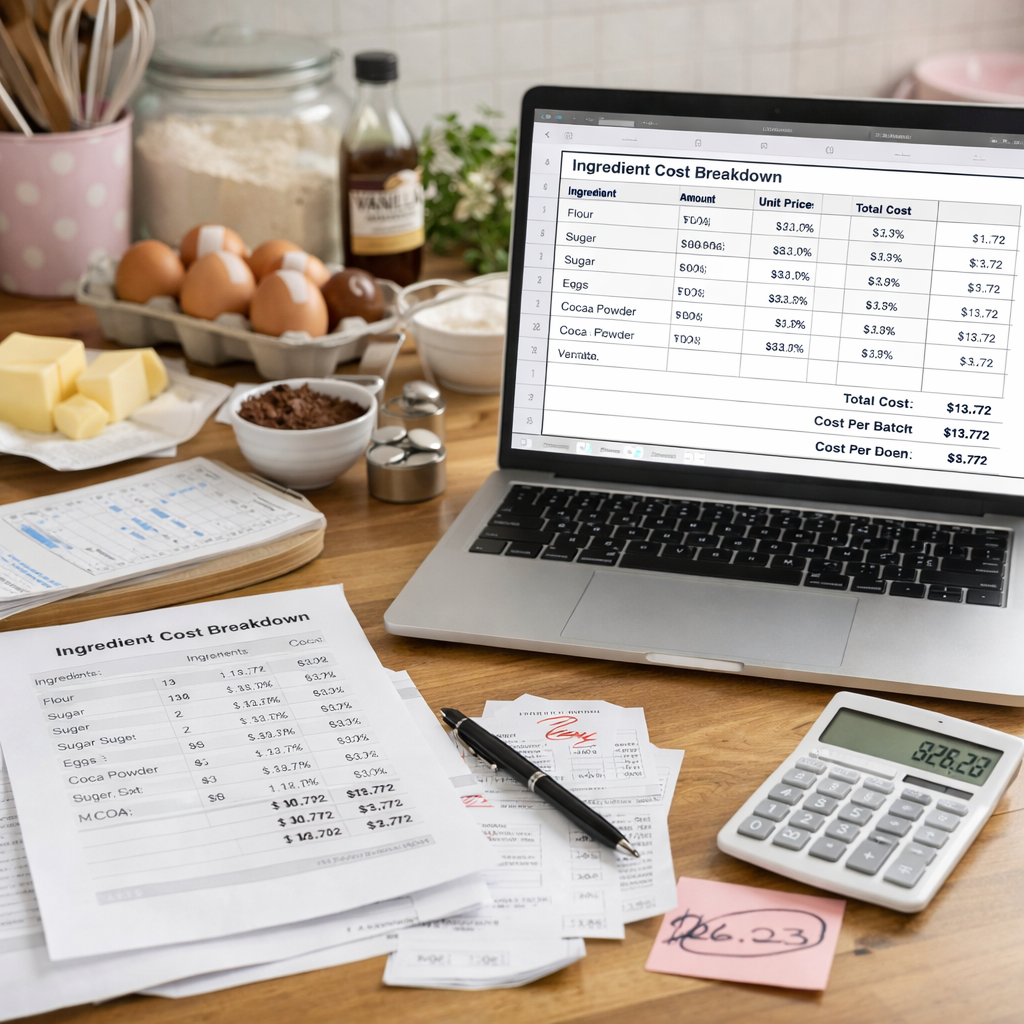
    You can’t accurately price your work. If you don’t know what equipment you have, you can’t account for the wear and replacement cost of those tools in your pricing. Your molds, cutters, and pans are business assets — they have value and they have a lifespan.

    You keep buying storage solutions that don’t solve the root problem. Labeled bins are great. Pegboards are great. But physical organization alone doesn’t tell you what you own when you’re away from your workspace — like when you’re at a baking supply shop, on your phone, trying to remember if you already have a 6-inch hexagon pan.

    What Bakers Are Actually Doing (And Why It’s Not Enough)

    Scroll through any baking forum or Facebook group and you’ll see the workarounds people have cobbled together:

    Spreadsheets are the most common answer. Google Sheets, Excel, whatever they have access to. It works — until it doesn’t. Spreadsheets require you to actually update them every time you buy something new (who has time for that?), they’re not built for photos, and they don’t surface information quickly when you’re mid-conversation with a customer.

    Photo inventories on CDs or phones. Yes, people have been taking photos of their cutters and saving them to discs to carry around. It’s clever. It’s also a lot of manual effort for something that should be simple.

    Memory and vibes. Honestly? Most people. Which is why duplicate buying is basically a rite of passage in this community.

    General inventory apps. There are plenty of apps built for retail inventory or crafting supplies. They’ll do the job in a pinch, but they’re not built with bakers in mind. They don’t know what a silicone cavity mold is. They don’t have fields for “condition,” “size,” or “holiday theme.” You end up making the tool work for you instead of the other way around.

    What Actually Needs to Exist

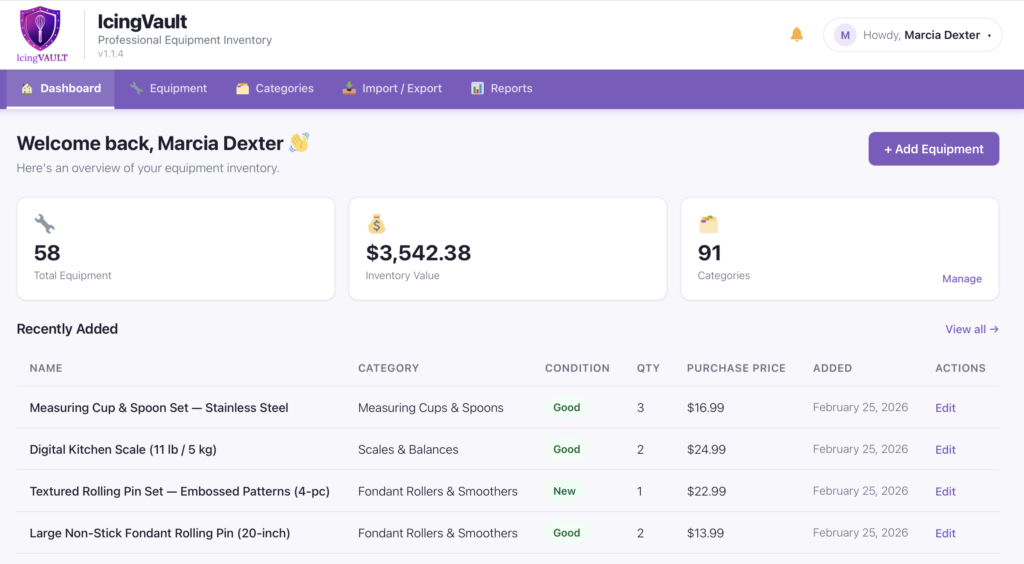
    What bakers actually need — and what I kept wishing existed every time I dug through my own bins — is something built specifically for this. A way to catalog equipment by category, add photos right from your phone, note condition and quantity, and pull it up instantly when you’re talking to a customer or standing in an aisle trying not to buy something you already own.

    That’s the entire reason I started building IcingVault.

    IcingVault is a bakery equipment inventory tracker built for home bakers and cottage food operators. Not a general spreadsheet template you have to wrestle into shape. Not a big expensive software suite built for commercial kitchens. Something that actually makes sense for the way we work — where “inventory” means cookie cutters organized by season, silicone molds by cavity count, and cake pans by size and finish.

    I’m still building it. I’ll be honest with you about that, because that’s how I operate here. But it’s being built by someone who has lived this exact frustration, not by a developer who googled “what do bakers need.”

    In the Meantime: A Starting Point

    If you want to start getting a handle on your equipment right now, here’s the simplest version that actually works:

    Pick one category — just one. Cookie cutters, cake pans, silicone molds, whatever is causing you the most grief. Go through that category, take photos on your phone, and drop them into a Google Photos album labeled by theme or type. Add a quick note to each photo with size, material, and where you store it. That’s it. Imperfect and incomplete is still a thousand times better than nothing, and you can build from there.

    The goal isn’t a perfect system on day one. It’s knowing what you have well enough to stop buying duplicates and start answering customer questions with confidence.

    You Deserve Tools That Actually Work for You

    One thing I’ve learned from running a real bakery is that the business side — the tracking, the pricing, the organizing — can quietly drain just as much energy as the baking itself. And when the tools don’t exist or aren’t built for people like us, we end up spending that energy on workarounds instead of on our actual craft.

    That’s what SweetTube Academy is here to change. Not by telling you what the experts say. By figuring it out alongside you and building the tools we both need.

    If IcingVault sounds like something you’ve been waiting for, head over  sweettubeacademy.com/icingvault. And if you have a tool-tracking system that’s working for you right now — a spreadsheet, a method, anything — drop it in the comments. I genuinely want to know what you’re doing. It helps me build better.

    We’re in this together.

    — Marcia


  • How to Price Homemade Baked Goods: Real Questions From Home Bakers (And What to Do About It)

    If you’ve ever finished a big order, done the math, and felt your stomach drop — you already know the problem. Most home bakers are losing money without realizing it. Not because they’re bad at baking. Because they were never taught how to price homemade baked goods correctly.

    Across Reddit threads, CakeCentral forums, and cottage food Facebook groups, the same questions come up every single week. We pulled the most common ones and answered them honestly — including what the math actually looks like and how home baker pricing software like BatterSuite takes the guesswork out of it.

    Smiling home baker decorating a cake in her kitchen
    Most home bakers undercharge — not because they want to, but because they don’t know their real costs. Photo by Ronit HaNegby / Pexels

    Am I Undercharging? How to Calculate the Real Cost of Your Baked Goods

    “I charge $1.50 per cupcake but my ingredients alone cost $0.50. Is that enough margin?” — CakeCentral forum

    Your instinct to be suspicious is right. That $0.50 ingredient cost is only the beginning. Pricing homemade baked goods correctly means accounting for every real cost, not just flour and eggs:

    • Electricity to run your oven (roughly $0.10–$0.20 per hour depending on your utility rate)
    • Packaging — boxes, tissue paper, ribbon, labels, bags
    • Your time to shop, prep, bake, decorate, box, and deliver
    • Equipment depreciation (your mixer is wearing out with every batch)
    • Gas or mileage for delivery or supply runs

    Add those up and that $1.50 cupcake might actually cost $1.75–$2.00 to produce. You’re not breaking even — you’re paying your customer to let you bake for them.

    The formula that works: Cost of goods + labor + overhead + profit margin = your price. Anything less and you’re subsidizing someone else’s party.

    What BatterSuite does: The recipe cost calculator tracks every ingredient down to the gram. Enter your bulk purchase price (a 5 lb bag of flour at $4.99) and BatterSuite calculates the exact cost per cup, per tablespoon — whatever unit your recipe uses. No spreadsheet math. No guessing.


    How to Handle Customers Who Say Your Prices Are Too High

    “A customer told me my prices were ‘way out of their price range.’ Should I lower them?”

    Short answer: probably not.

    Bakers who lower prices to match objections almost always regret it. Here’s why: customers who push hardest on price are usually not your customers. The right buyer for handmade, high-quality cottage food is not comparison-shopping against a grocery store sheet cake.

    What the complaint is actually telling you: your marketing may not be reaching the right audience yet — not that your prices are wrong.

    The deeper issue: most home bakers don’t know their actual cost. They guess. So when a customer pushes back, there’s a flash of self-doubt — “Maybe I am charging too much?” — when they have no way to confirm either way. That uncertainty is the real problem.

    What BatterSuite does: When your price is built from real numbers — ingredients + labor + overhead + margin — you can stand behind it confidently. You’ll know exactly what you need to charge to be profitable, and you can stop second-guessing yourself every time someone balks at the price.

    Home baker reviewing pricing documents and cost formulas at a desk
    Knowing your exact costs transforms pricing from guesswork into confidence. Photo by Leeloo The First / Pexels

    How to Calculate Your Hourly Rate as a Home Baker

    “I spent 6 hours on a custom cake, charged $80, and realized I made $13/hour before expenses. How do I set a rate that actually makes sense?” — r/Baking

    This is one of the most common questions in cottage food and side hustle communities — and one of the most important to get right. Here’s a starting framework for how to calculate your hourly rate as a home baker:

    1. Set your target income. What do you need or want to earn per month from baking?
    2. Estimate your real capacity. How many actual hours per week can you bake, prep, deliver, and run admin?
    3. Divide target by hours. That’s your minimum effective hourly rate.
    4. Layer in overhead. Supplies, insurance, packaging, marketing — these come out of every hour you work.

    If your math says you need $35/hour but your local market supports $20/hour, that’s critical information. It means you may need to find higher-margin products, reduce input costs, or be honest about what this business can realistically earn right now.

    What BatterSuite does: Set your labor rate once and it’s automatically factored into every recipe and quote. Change it anytime — everything updates instantly. You can also compare products side by side to see which ones are worth your time and which ones are costing you money.


    How to Adjust Your Baked Goods Prices When Ingredient Costs Rise

    “Egg prices went through the roof. How do I raise prices without losing my customers?”

    This hit hard in 2025. Egg prices spiked over $5/dozen in many parts of the country due to widespread avian flu outbreaks — and bakers who hadn’t updated their pricing absorbed those losses themselves.

    The business reality is simple: if your costs go up and your prices stay flat, your margin disappears. Every dollar in extra ingredient cost you absorb is a dollar less you’re paying yourself.

    How successful home bakers handle ingredient price spikes:

    • Communicate transparently with regulars. A short note — “ingredient costs have increased, so I’ve adjusted my pricing slightly” — lands better than a silent price jump.
    • Price slightly above current cost. Build a small buffer so you’re not immediately underwater the next time something spikes.
    • Raise prices before you have to, not after. Reactive price increases feel larger and more urgent to both you and your customers.

    What BatterSuite does: Update an ingredient cost once in your ingredient library and every recipe using that ingredient recalculates automatically. You’ll see immediately which products are now unprofitable and by exactly how much — without touching a single spreadsheet.

    Overhead view of a pricing calculator and business cost documents on a desk
    One ingredient price change should update everything — not send you back to the spreadsheet. Photo by Leeloo The First / Pexels

    Why Home Bakers Break Even on Big Orders — and How to Stop It

    “I just finished a huge holiday order and barely broke even. What did I miss?”

    This is the post-mortem almost every home baker writes at some point. Big orders look profitable up front and feel devastating afterward. Here’s what almost always gets missed:

    • Shopping time — driving to three stores to find specialty sprinkles is unpaid time unless you price for it
    • Packaging — boxes, ribbon, tissue, labels, and bags add up fast on large orders
    • Utilities — 8 hours of oven use across a big holiday batch is a real line item
    • Custom design time — the hour you spent sketching the cake design before you ever touched flour
    • Admin time — emails, revisions, payment follow-ups, scheduling

    Most bakers track ingredients well. Almost none track the full picture. And the full picture is where the profit lives.

    What BatterSuite does: The overhead allocation feature lets you define your fixed and variable costs — utilities, average packaging, insurance, supplies — and BatterSuite distributes that overhead across orders automatically. You see your true margin before you take the order, not after you finish it.


    How to Charge What Your Baked Goods Are Worth (Without the Guilt)

    This question rarely gets posted publicly. It shows up in private Facebook groups and baker DMs: I feel guilty charging full price for something I love doing.

    It’s real, and it’s common, and it quietly destroys more baking businesses than any pricing formula ever will.

    A few reframes that have helped other home bakers:

    • Your skill took years to develop. You’re not charging for “just a cake.” You’re charging for everything you learned to make that cake possible.
    • Undercharging doesn’t signal humility — it devalues the craft for every baker in your community.
    • If you burn out making nothing, the thing you love becomes a source of stress instead of joy. Sustainable pricing protects the work, not just the business.

    The bakers who thrive long-term learn to separate their emotional relationship with the work from the financial reality of running a business. Both can exist. They just can’t share the same spreadsheet cell.

    Artisanal homemade cookies packaged in a bakery box ready for delivery
    Your time, skill, and ingredients all have real value. Packaging it correctly starts with knowing your real costs. Photo by Natalia Olivera / Pexels

    Home Baker Pricing Software: Managing Your Bakery Business as One Person

    “Is there an easier way to manage all of this? I’m just one person.”

    Yes — and it’s exactly why BatterSuite was built.

    Most home bakers are running their business across a patchwork of Notes apps, Google Sheets, Instagram DMs, and mental math. It works — right up until it doesn’t. Until an order gets lost. Until you can’t remember what you charged a customer last year. Until tax season hits and you have no idea what your actual revenue was.

    BatterSuite is home baker pricing software that brings everything into one place:

    • Recipe cost calculator — build your recipes, track every ingredient cost, see cost of goods instantly
    • Pricing tool — set your labor rate and profit margin, get a price that actually works for your business
    • Order management — track orders from inquiry to delivery, never lose a detail
    • Client records — every customer, every order, every conversation, organized in one place
    • Gift certificates — sell and redeem gift certificates built right in
    • Loyalty program — reward repeat customers automatically

    At $22.99/month (or $199/year — less than $17/month), BatterSuite is built specifically for the scale of a cottage food or home bakery operation. Not a bloated restaurant POS. Not a generic invoicing tool. Something made for bakers, by people who understand how this business actually works.

    Try BatterSuite Free for 30 Days →


    The Bottom Line: Profitable Home Baking Starts with Real Numbers

    The home bakers building sustainable businesses aren’t necessarily the most talented. They’re the ones who took pricing seriously, learned their real costs, and stopped guessing.

    Every question above is the same question in a different shape: how do I know if I’m making money? And the answer is the same every time — you need real numbers to make real decisions. A gut feeling isn’t a pricing strategy.

    BatterSuite gives you those numbers, automatically, so you can focus on the baking.

    Start Your Free 30-Day Trial


    Frequently Asked Questions About Home Baker Pricing

    What is a good profit margin for a home bakery?

    Most cottage food and home bakery businesses aim for a 30–50% profit margin after accounting for ingredients, labor, and overhead. Many bakers start far below this because they don’t include labor or overhead in their pricing at all. A recipe cost calculator helps you identify your true margin before you set a price.

    How do I calculate the cost of a homemade cake?

    Add up the cost of every ingredient (down to tablespoon-level precision), add packaging costs, calculate your time at your labor rate, and add a share of your monthly overhead (utilities, insurance, supplies). That total is your cost of goods. Your price should be your cost plus your desired profit margin.

    Should I charge for my time as a home baker?

    Yes — always. Your time is the most expensive ingredient in almost every recipe. Experienced bakers charge anywhere from $15 to $50+ per hour depending on skill level, local market, and product complexity. Many home bakers start undercounting their hours and gradually build toward a rate that reflects the real value of their work.

    What’s the best software for home baker pricing?

    BatterSuite is built specifically for home bakers and cottage food businesses. Unlike generic invoicing tools or restaurant POS systems, it’s designed around the way home bakers actually work — recipe-based costing, per-order pricing, client tracking, and order management in one place.

    How do I handle ingredient price increases as a home baker?

    Update your ingredient costs in your pricing tool as soon as prices change, then review which products are no longer hitting your margin target. It’s better to raise prices proactively with a brief note to regular customers than to wait until you’re losing money on every order.


    Have a pricing question we didn’t cover? Drop it in the comments — we read every one.

    Images sourced from Pexels (free to use). Photo credits: Ronit HaNegby, Leeloo The First, Natalia Olivera.

  • Stop Undercharging: Why Most Home Bakers Price Too Low (And How to Fix It)

    Calculator and pricing documents on desk - business planning

    You spent three hours decorating those cookies. You used premium ingredients. You poured your heart into every detail.

    And then you charged $30 a dozen.

    Sound familiar?

    If you’ve ever looked at your bank account after a big order and wondered where all the profit went, you’re not alone. Most home bakers are undercharging — not because they don’t value their work, but because they genuinely don’t know what their products actually cost to make.

    The Real Reason You’re Undercharging

    It’s not lack of confidence (though that doesn’t help). It’s not imposter syndrome (though many of us deal with that too).

    The real reason? You’re guessing.

    You’re eyeballing ingredient costs. You’re not tracking your time. You’re forgetting about packaging, utilities, and all those “little” expenses that add up fast. You’re looking at what other bakers charge and hoping you’re in the right ballpark.

    And when someone questions your price? You panic and lower it.

    Display of cookies in bakery shop

    What Actually Goes Into Pricing

    Let’s talk about what you’re REALLY selling when someone orders a dozen custom cookies:

    Ingredients: Butter, flour, sugar, food coloring, flavoring extracts — every single item has a cost, and it adds up faster than you think.

    Time: Shopping for supplies, mixing dough, baking, cooling, decorating, boxing, communicating with the customer. That’s not just “a few hours” — that’s skilled labor that deserves to be compensated.

    Overhead: Electricity to run your oven. Water for washing dishes. Packaging materials. Business insurance. Website hosting. These aren’t optional — they’re the cost of running a legitimate business.

    Expertise: You didn’t learn to bake overnight. Your skills, your recipes, your ability to turn someone’s Pinterest dream into reality — that has VALUE.

    The $45 Dozen That Actually Costs $52

    Here’s a real example from my own bakery:

    I was charging $45/dozen for simple decorated cookies. Seemed fair, right? Competitive with other local bakers. Customers weren’t complaining.

    Then I actually calculated the costs:

    • Ingredients: $18.50
    • Packaging: $4.20
    • Labor (3 hours at $20/hr): $60
    • Overhead allocation: $6.30
    • Total actual cost: $89

    I was losing $44 per order. And wondering why I was always stressed about money.

    Sound familiar?

    Pricing formula document with laptop and calculator

    Why “Competitive Pricing” Is Keeping You Broke

    Here’s what I see all the time in baker Facebook groups:

    “What should I charge for a dozen cookies?”

    And everyone chimes in with their prices. $25. $35. $40. Maybe $50 if you’re fancy.

    But here’s the problem: their costs aren’t your costs.

    Maybe they buy ingredients in massive bulk. Maybe they already own professional equipment. Maybe they’re not factoring in their time because they consider baking a “hobby.”

    When you price based on what others charge instead of what YOU need to charge to be profitable, you’re building a business on quicksand.

    The Confidence That Comes From Knowing Your Numbers

    Everything changed when I started actually tracking my costs.

    Not guessing. Not estimating. Actually calculating.

    Suddenly, I could look a customer in the eye and say, “That’s $72 a dozen” without flinching. Because I knew exactly where that number came from. I knew my profit margin. I knew I wasn’t losing money.

    And you know what? My sales didn’t drop. In fact, they increased.

    Because confidence is attractive. When you know your worth, customers trust your pricing.

    You Need a System, Not Just a Spreadsheet

    I tried the Excel spreadsheet thing. I really did.

    But here’s what happened: I’d update one ingredient cost and forget to update it in three different tabs. I’d lose track of which version was current. I’d spend 20 minutes hunting for the right file.

    What I needed was a system that:

    • Calculated costs automatically
    • Updated everything when I changed one number
    • Was easy to access and actually USE
    • Didn’t require a degree in spreadsheets

    So I built one. And now I’m giving it to you.

    Introducing the Sweet Start Pricing Kit

    This is the exact system I use in my own bakery to price every single product.

    It’s a Notion template (don’t worry, Notion is free and super easy to use) that includes:

    ✅ Ingredient Cost Calculator
    Track every ingredient you use, what you paid for it, and how much each recipe actually costs. No more guessing. No more “close enough.”

    ✅ Automatic Cost Calculations
    Enter your ingredient amounts once, and the template does the math for you. Update a price, and everything recalculates instantly.

    ✅ Customizable Database
    Add your own ingredients, your own recipes, your own costs. This isn’t a one-size-fits-all template — it’s designed to work for YOUR business.

    Hands organizing business documents and pricing papers

    What You’ll Be Able to Do

    After you set up this pricing kit (takes about 15 minutes), you’ll be able to:

    • Calculate the exact cost of any recipe in seconds
    • Know your minimum price before you even talk to a customer
    • Adjust for ingredient price changes without panic
    • See which products are actually profitable (spoiler: it might not be what you think)
    • Quote prices with total confidence
    • Stop leaving money on the table

    This Is Your Business. Treat It Like One.

    You wouldn’t walk into Target and negotiate the price of milk, right?

    So why are you letting customers negotiate YOUR prices?

    It’s because you’re not sure. You don’t have the numbers to back you up. You’re afraid they’ll think you’re too expensive.

    But here’s the truth: Professional businesses have professional prices.

    And professional prices are based on actual costs, not guesswork and fear.

    Ready to Stop Guessing and Start Profiting?

    The Sweet Start Pricing Kit is completely free. No credit card. No catch. Just a genuine tool to help you run a more profitable bakery.

    Because I’m tired of seeing talented bakers burn out because they can’t make the numbers work. I’m tired of watching incredible artists undervalue their work. I’m tired of the “race to the bottom” pricing that keeps all of us struggling.

    You deserve to make money doing what you love.

    Let’s make that happen.

    Get Your Free Pricing Kit Now →

    What happens next: Click the button above, enter your email, and you’ll instantly receive your Sweet Start Pricing Kit. It takes about 15 minutes to set up, and then you’ll have a pricing system you can use forever. No commitment. No upsells. Just a tool to help you charge what you’re worth.

    See you on the other side of undercharging,

    Marcia
    Founder, SweetTube Academy
    Owner, Marcia’s Micro-Bakery

    P.S. — Still not sure? Reply to the welcome email after you download and tell me your biggest pricing struggle. I read every message and I’ll help you figure it out.

  • Master Holiday Cake Decorating: Your Complete Guide to Festive Baking Success

    Holiday cake decorating workspace

    There’s something magical about creating beautiful holiday cakes that bring smiles to everyone around the table. Whether you’re baking for family gatherings, starting a seasonal side hustle, or simply want to level up your holiday baking skills, mastering festive cake decorating opens up a world of creative possibilities.

    At SweetTube Academy, we’ve taught thousands of bakers how to create stunning holiday cakes that look professionally done—because with the right techniques and guidance, anyone can achieve bakery-quality results at home. This comprehensive guide will walk you through everything you need to know about holiday cake decorating, from essential techniques to trending designs for this season.

    Why Learn Holiday Cake Decorating?

    Before we dive into techniques, let’s talk about why developing these skills is worth your time—especially during the holiday season.

    Financial Opportunity: Holiday cakes are in high demand from November through January. Many of our students use these months to earn significant extra income by taking custom orders from friends, family, and local customers. Some turn their holiday baking into year-round businesses!

    Creative Satisfaction: There’s immense pride in creating something beautiful with your own hands. Watching friends and family light up when they see your creation is incredibly rewarding. Holiday baking combines artistry with deliciousness.

    Skill Building: Holiday designs teach you techniques you’ll use all year—piping skills, color theory, structural considerations, and design planning. These fundamentals translate to every cake you’ll ever make.

    Quality Time: Many bakers find the decorating process meditative and relaxing. It’s creative time that’s just for you, away from holiday chaos.

    Essential Holiday Decorating Techniques

    Let’s start with the foundational skills that make holiday cake decorating possible. Master these, and you’ll be able to tackle any festive design.

    Buttercream Mastery

    The Foundation: Holiday cakes demand smooth, professional buttercream finishes. Whether you’re creating a winter wonderland cake or a cozy Christmas design, your buttercream technique makes or breaks the final look.

    Key Skills:
    – Achieving perfect buttercream consistency (not too soft, not too stiff)
    – Smooth finishing with bench scraper and turntable
    – Creating texture intentionally (rustic finishes, combed patterns)
    – Understanding when to chill versus work at room temperature

    Pro Tips: Room temperature is critical—buttercream should be spreadable but hold its shape. If it’s too cold, let it sit 30 minutes. Too warm? Refrigerate briefly. Small adjustments make huge differences in your results.

    Piping Techniques for Holiday Designs

    Piping brings holiday cakes to life with intricate details, borders, and decorative elements.

    Essential Piping Skills:
    – Border work (shells, rosettes, rope borders)
    – Writing and lettering for holiday messages
    – Flowers and botanical elements (holly, poinsettias)
    – Snowflakes and geometric patterns
    – Drop flowers for quick, elegant decoration

    Tips for Success:
    – Fill piping bags only halfway to prevent bursts
    – Practice consistent pressure for uniform designs
    – Keep buttercream at ideal consistency (add powdered sugar if too thin, tiny amounts of milk if too thick)
    – Use quality gel food coloring for vibrant holiday colors

    Working with Fondant

    Fondant creates sleek, professional finishes and allows for intricate cutout decorations perfect for holiday themes.

    Fondant Basics:
    – Kneading and conditioning fondant properly
    – Rolling to consistent 1/4 inch thickness
    – Covering cakes smoothly without air bubbles
    – Creating cutouts (snowflakes, stars, holiday shapes)
    – Using fondant tools for texture and detail

    Common Mistakes to Avoid:
    – Rolling too thin (leads to tears)
    – Applying to unsmooth crumb coat (shows every bump)
    – Not working quickly enough (fondant dries and cracks)
    – Using water instead of shortening to repair tears

    Trending Holiday Designs for This Season

    Let’s explore what’s popular right now in holiday cake design. These trends work for both personal celebration cakes and custom orders if you’re building a baking business.

    Winter Wonderland Elegance

    Design Elements:
    – White or pale blue buttercream base
    – Silver snowflake decorations (fondant or royal icing)
    – Edible pearls and metallic accents
    – Icy, crystalline textures
    – Minimalist sophistication

    Perfect For: New Year’s Eve parties, winter weddings, sophisticated adult gatherings

    Technique Focus: Smooth buttercream finishes, delicate piping work, working with edible metallics

    Traditional Christmas Warmth

    Design Elements:
    – Rich reds and greens
    – Holly, pine branches, plaid patterns
    – Gold accents for luxury feel
    – Textured buttercream (rustic or combed)
    – Classic holiday motifs

    Perfect For: Family Christmas dinners, office parties, traditional celebrations

    Technique Focus: Color mixing, piping botanical elements, creating texture with buttercream

    Modern Minimalist Holiday

    Design Elements:
    – Clean lines and geometric shapes
    – Restrained color palette (one or two colors)
    – Abstract holiday elements
    – Negative space as design element
    – Contemporary aesthetic

    Perfect For: Trendy celebrations, young professionals, Instagram-worthy events

    Technique Focus: Precision work, smooth finishes, design planning, restraint in decoration

    Rustic Farmhouse Christmas

    Design Elements:
    – Semi-naked or lightly frosted cakes
    – Fresh cranberries, rosemary, natural elements
    – Earthy color palette
    – Organic, imperfect beauty
    – Natural wood cake stands

    Perfect For: Casual family gatherings, farmhouse-style celebrations, outdoor winter events

    Technique Focus: Controlled “messy” finishes, working with fresh ingredients, balancing rustic with intentional design

    Hanukkah Celebration Designs

    Design Elements:
    – Blue and white color schemes
    – Stars of David, menorahs, dreidels
    – Silver accents
    – Elegant, celebratory designs
    – Traditional symbolism with modern execution

    Perfect For: Hanukkah celebrations, Jewish holiday events

    Technique Focus: Clean color work, fondant or royal icing decorations, cultural sensitivity in design

    Color Theory for Holiday Cakes

    Understanding color is crucial for stunning holiday cakes. Let’s break down how to work with festive colors effectively.

    Creating Vibrant Holiday Colors

    Red: Start with a LOT of gel food coloring—red is notoriously difficult. Start with white buttercream, not vanilla-colored. Consider using “no taste red” gel to avoid bitterness.

    Green: Easier than red! Start with less coloring than you think—you can always add more. Kelly green works for Christmas, mint green for winter wonderland.

    Blue: For Hanukkah and winter themes. Royal blue for traditional looks, pale blue for elegant winter designs.

    Metallics: Gold and silver edible paints, luster dust, or pre-colored fondant add luxury to holiday cakes.

    Pro Tips:
    – Mix colors in small batches first to test
    – Colors deepen as buttercream sits—start lighter
    – Never mix complementary colors (red + green = brown!)
    – Use white buttercream base for most vibrant results

    Essential Tools for Holiday Cake Decorating

    Having the right tools makes holiday decorating significantly easier. Here’s what you actually need:

    Must-Have Tools

    Basic Equipment:
    – Turntable (game-changer for smooth finishes)
    – Offset spatula (for spreading and smoothing)
    – Bench scraper (creates perfectly smooth sides)
    – Quality piping bags and tips (disposable or reusable)
    – Gel food coloring (more vibrant than liquid)

    Holiday-Specific:
    – Snowflake cutters or stencils
    – Star tips for piped snowflakes
    – Letter/number sets for holiday messages
    – Edible metallic dust or paint
    – Holiday-themed cookie cutters (double as fondant cutters)

    Nice to Have:
    – Fondant smoother
    – Various piping tips (stars, round, leaf)
    – Impression mats for texture
    – Edible glitter and pearls
    – Cake leveler

    Budget-Friendly Alternatives

    Don’t have everything yet? No problem!

    – Use a lazy susan instead of expensive turntable
    – Parchment paper piping bags instead of buying disposable
    – Print free snowflake templates instead of buying cutters
    – Regular sugar can substitute for edible glitter
    – Toothpicks work for detail work if you don’t have fine tools yet

    Time Management for Holiday Baking

    The holidays are busy—smart planning ensures you enjoy the process rather than stress over deadlines.

    Baking & Decorating Timeline

    3-4 Days Before Event:
    – Bake cake layers
    – Wrap well and freeze (maintains moisture!)
    – Plan design and gather decorations

    2 Days Before:
    – Make buttercream and fillings
    – Store properly (refrigerate fillings, room temp for buttercream)
    – Prepare fondant decorations (they need time to firm up)

    1 Day Before:
    – Assemble and crumb coat
    – Let crumb coat set in fridge (at least 30 minutes)
    – Apply final buttercream coat
    – Refrigerate overnight

    Day Of Event:
    – Add final decorations
    – Transport carefully
    – Display within 2-3 hours for freshness

    Managing Multiple Orders (For Business Bakers)

    Planning to take holiday orders? Smart scheduling prevents burnout.

    Tips:
    – Limit orders to what you can realistically handle
    – Stagger pickup dates (don’t book everything for Dec 23rd!)
    – Batch similar tasks (bake all cakes one day, decorate another)
    – Build in buffer time for mistakes or delays
    – Communicate clear deadlines to customers

    Common Holiday Decorating Challenges (And Solutions)

    Let’s troubleshoot issues you’re likely to encounter so you can prevent or fix them.

    Problem: Buttercream Won’t Smooth

    Causes: Too cold (butter solidified), too warm (melting), wrong consistency.

    Solutions: Room temperature is key—buttercream should be spreadable but hold shape. If too cold, let it sit 30 minutes. If too warm, refrigerate briefly. Add small amounts of powdered sugar if too thin, tiny amounts of milk if too thick.

    Problem: Colors Look Muddy

    Causes: Mixing complementary colors (red + green = brown), over-mixing, using old or poor-quality gel.

    Solutions: Start with white buttercream for vibrant colors. Mix each color separately, don’t mix complementary colors. Use quality gel food coloring. Remember colors deepen as they sit—start lighter.

    Problem: Piping Bag Bursts

    Causes: Bag too full, buttercream too soft, seam failed, excessive pressure.

    Solutions: Fill bags only halfway. Ensure buttercream is proper consistency (if too soft, refrigerate). Fold bag top tightly. Use quality bags. Practice steady pressure rather than squeezing hard.

    Problem: Fondant Tears or Cracks

    Causes: Too dry, rolled too thin, cake underneath not smooth, moved too quickly.

    Solutions: Knead fondant with small amounts of shortening if dry. Roll to 1/4 inch thickness. Ensure crumb coat is smooth. Work quickly but don’t rush. Repair tears with water and smoothing.

    Problem: Decorations Sliding Off

    Causes: Buttercream too warm, decorations too heavy, gravity.

    Solutions: Chill cake before adding heavy decorations. Use royal icing or melted chocolate as “glue” for heavy pieces. Consider structural support for very heavy elements.

    Learning Resources at SweetTube Academy

    Ready to take your holiday baking to the next level? SweetTube Academy offers comprehensive resources designed to build your skills systematically.

    Membership Options

    Sweet Starter Pack – $5/month
    Perfect for new bakers who want professional templates and community support:
    – 4 Professional Canva Templates Monthly
    – Social Media Post Templates
    – Story & Highlight Covers
    – Access to Private Member Forum
    – Template Tutorial Videos
    – Commercial Use License

    Sweet Premium Pack – $9/month ⭐ MOST POPULAR
    For serious business growth and advanced learning:
    – Everything in Sweet Starter, PLUS:
    – 6+ Premium Templates Monthly
    – Exclusive Bonus Templates
    – Monthly Live Q&A Sessions
    – Priority Email Support
    – Advanced Marketing Templates
    – Seasonal Campaign Packages
    – First Access to New Releases

    Community Support

    Private Member Forum: Connect with fellow bakers, share your holiday creations, ask questions, and get real-time troubleshooting help from instructors and peers.

    Monthly Live Q&A Sessions (Premium Members): Ask specific questions about your holiday cakes and get expert guidance in a supportive group setting.

    Template Resources: Access professional Canva templates for marketing your holiday cakes if you’re building a business.

    Make This Holiday Season Your Best Baking Year

    The holidays are the perfect time to develop your cake decorating skills. Whether you’re creating for family, building a business, or simply pursuing a creative passion, the techniques you master this season will serve you for years.

    Remember: every expert was once a beginner. Give yourself grace with early attempts, celebrate progress over perfection, and enjoy the creative journey. Your holiday cakes don’t have to be flawless to be beautiful and meaningful.

    Ready to master holiday cake decorating?

    Visit SweetTube Academy today:

    🌐 Website: sweettubeacademy.com
    📧 Email: info@sweettubeacademy.com | support@sweettubeacademy.com
    📸 Instagram: Follow @sweettubeacademy for daily tips and inspiration

    Join thousands of bakers who have transformed their holiday baking with professional techniques and supportive community. Your journey to stunning holiday cakes starts now!

  • How AI is Revolutionizing Your Baking Business (And How You Can Use It Today)

    As a baking business owner, you’re juggling countless tasks every day – from perfecting recipes and decorating cookies to managing orders, responding to customer inquiries, and marketing your creations. What if I told you that artificial intelligence (AI) could help you work smarter, save time, and grow your business faster than ever before?

    AI isn’t just for tech giants anymore. It’s become an accessible, practical tool that home bakers and small bakery owners can use right now to streamline operations, boost creativity, and reclaim precious time. Let’s explore how AI is transforming the baking business landscape and how you can start using it today.

    Understanding AI for Small Baking Businesses

    First, let’s demystify what AI actually means for your baking business. You don’t need to be a tech expert or have a big budget. AI tools today are user-friendly, affordable (often free), and designed to help small business owners like you automate repetitive tasks and make better decisions.

    Think of AI as your digital assistant – one that never sleeps, doesn’t take vacations, and can handle multiple tasks simultaneously while you focus on what you do best: creating amazing baked goods.

    1. Customer Service & Communication

    The Challenge: Responding to customer inquiries about ingredients, pricing, availability, and custom orders can consume hours of your day.

    The AI Solution: AI-powered chatbots and email assistants can handle common customer questions 24/7, freeing you to focus on complex custom orders and actual baking. Tools like ChatGPT, Claude, or specialized customer service platforms can draft professional responses to emails, answer FAQs on your website, and even help you create templates for common scenarios.

    Real-world application: Use AI to draft responses to inquiry emails, create auto-responses for your booking system, or generate personalized thank-you messages for customers. You review and send – saving hours each week.

    2. Content Creation & Marketing

    The Challenge: Consistently creating engaging social media posts, blog content, and marketing materials while running your business.

    The AI Solution: AI can help generate blog post ideas, write social media captions, create email newsletters, and even design graphics. Tools like ChatGPT for writing, DALL-E or Midjourney for images, and Canva’s AI features for design make content creation faster and easier.

    Practical tips:

    • Use AI to brainstorm 30 days of social media post ideas in minutes
    • Generate multiple caption variations for the same photo and choose your favorite
    • Create blog posts about seasonal baking trends, tips, and tutorials
    • Design eye-catching graphics for promotions without hiring a designer
    • Write compelling product descriptions for your website or Etsy shop

    3. Recipe Development & Documentation

    The Challenge: Organizing recipes, scaling ingredients, calculating costs, and documenting your processes.

    The AI Solution: AI can help you format recipes professionally, calculate ingredient costs, scale recipes up or down, and even suggest ingredient substitutions. You can also use AI to convert your handwritten or messy recipe notes into clean, shareable formats.

    How to implement: Take a photo of your handwritten recipe, use AI image recognition to convert it to text, then ask AI to format it professionally with proper measurements, instructions, and even estimated prep/bake times.

    4. Business Planning & Strategy

    The Challenge: Making informed decisions about pricing, product offerings, marketing strategies, and business growth.

    The AI Solution: AI can analyze your sales data, identify trends, suggest profitable product ideas, and help you create business plans. It can also help you research competitors, understand market demands, and develop pricing strategies.

    Examples of AI assistance:

    • Analyze which products sell best during different seasons
    • Calculate profit margins and suggest optimal pricing
    • Create quarterly business plans and goal-setting frameworks
    • Research trending flavor combinations and design styles
    • Draft policies for cancellations, refunds, and custom orders

    5. Design & Creative Inspiration

    The Challenge: Coming up with fresh, creative designs for cookies, cakes, and other decorative baked goods.

    The AI Solution: AI image generators can create design inspiration, mood boards, and even custom cookie cutter designs. You can describe what you want and AI will generate visual concepts to spark your creativity.

    Creative uses: Generate color palette ideas for themed orders, visualize cake designs before starting, create custom cookie cutter concepts to 3D print, or develop unique piping patterns and techniques.

    6. Administrative Tasks & Organization

    The Challenge: Managing orders, tracking inventory, scheduling deliveries, and keeping financial records organized.

    The AI Solution: AI can help create order tracking systems, generate invoices, organize your calendar, and even draft contracts or terms of service. Voice assistants can take notes during client consultations or help you create to-do lists hands-free while working.

    Getting Started: Your AI Toolkit

    Ready to incorporate AI into your baking business? Here’s a beginner-friendly toolkit to get you started:

    Free AI Tools Every Baker Should Try:

    • ChatGPT or Claude (Free versions) – For writing, brainstorming, customer service, and general business tasks
    • Canva (Free AI features) – For creating graphics, social media posts, and marketing materials
    • Google Gemini – For research, content creation, and business planning
    • Grammarly (Free version) – For polishing your written communications
    • Remove.bg – For removing backgrounds from product photos

    Best Practices: Using AI Effectively

    While AI is powerful, it’s most effective when used thoughtfully. Here are some best practices:

    1. Always review and personalize – AI-generated content should be a starting point, not the final product. Add your unique voice, expertise, and personality.
    2. Protect customer privacy – Never input sensitive customer information (names, addresses, payment details) into AI tools.
    3. Stay authentic – Use AI to enhance your work, not replace your creativity and expertise.
    4. Learn the basics – Spend time understanding how to prompt AI effectively. The better your prompts, the better your results.
    5. Test and iterate – Experiment with different tools and approaches to find what works best for your business.

    Common Concerns Addressed

    “Won’t AI replace human bakers?” No! AI is a tool to handle repetitive tasks, allowing you more time to focus on the creative, hands-on work that makes your baked goods special. Your artistry, expertise, and personal touch can never be replaced.

    “Is it expensive?” Many powerful AI tools have free versions that are perfect for small businesses. You can start using AI today without any financial investment.

    “Do I need to be tech-savvy?” Not at all! Today’s AI tools are designed to be user-friendly. If you can use a smartphone or computer, you can use AI.

    Real Success Stories

    Bakers around the world are already using AI to transform their businesses. Home bakers are using AI to write professional product descriptions that increase sales. Small bakeries are using AI chatbots to handle order inquiries during off-hours. Cookie decorators are using AI to generate design inspiration and create content for their social media channels.

    The common thread? They’re all saving time, reducing stress, and growing their businesses while still maintaining the artisanal quality and personal touch that makes their work special.

    Your Next Steps

    Ready to harness the power of AI for your baking business? Start small:

    1. Choose one area – Pick the biggest time-drain in your business (probably customer emails or social media)
    2. Try one tool – Start with a free AI assistant like ChatGPT or Claude
    3. Give it two weeks – Commit to using AI for this one task consistently
    4. Measure the impact – Track how much time you’re saving
    5. Expand gradually – Once you’re comfortable, add AI to other areas of your business

    The Future is Here

    AI is no longer a futuristic concept – it’s a practical business tool available to you right now. The bakers who embrace these technologies today will have more time for creativity, better work-life balance, and stronger, more profitable businesses tomorrow.

    You don’t have to do it all yourself anymore. Let AI handle the repetitive tasks while you focus on what you love: creating beautiful, delicious baked goods that bring joy to your customers.

    Want to learn more about growing your baking business? Check out our courses and tutorials at SweetTube Academy, where we share practical strategies, tools, and techniques to help you build a successful baking business – including how to effectively use technology and AI in your operations.

    What AI tools are you curious about trying in your baking business? Share your thoughts in the comments below!

  • Should I Carry Business Insurance?

    [vc_row full_width=”stretch_row” css=”.vc_custom_insurance_hero{background: linear-gradient(135deg, #f8f9fa 0%, #e9ecef 50%, #dee2e6 100%); padding-top: 80px !important; padding-bottom: 80px !important; text-align: center; border-radius: 30px !important; margin-bottom: 60px !important;}”][vc_column][vc_column_text]

    Should I Carry Business Insurance? 🍪✨

    Hey sweet entrepreneur! 💕 Let’s chat about something super important but not-so-scary: business insurance for your home-based venture!

    [/vc_column_text][/vc_column][/vc_row]
    [vc_row css=”.vc_custom_section{padding-top: 60px !important; padding-bottom: 40px !important;}”][vc_column][vc_column_text]

    The Real Talk About Insurance Requirements

    Most states don’t actually require business insurance for home businesses, but here’s the thing – where and how you sell can totally change the game!

    For example, if you’re planning to set up a booth at the local craft fair or sell your gorgeous handmade items at a holiday market, many event coordinators will ask for proof of insurance before you can participate. It’s always smart to check both your state’s home business regulations and any venue requirements where you hope to showcase your amazing work.

    [/vc_column_text][/vc_column][/vc_row]
    [vc_row css=”.vc_custom_story_section{background: linear-gradient(135deg, #fff3cd 0%, #ffeaa7 100%); padding-top: 50px !important; padding-bottom: 50px !important; border-radius: 25px !important; margin: 40px 0 !important;}”][vc_column][vc_column_text]

    My Personal Insurance Journey 💡

    Even if nobody’s making you get insurance, I’m here to tell you it’s one of the BEST investments you can make for your peace of mind! 🌟

    I’ll be honest – I went without insurance for way too long (yikes!), but once I finally got coverage, it felt like this huge weight lifted off my shoulders. Plus, it’s way more affordable than you might think!

    I ended up going with Hiscox Insurance for my creative business, and the whole process was done online in about 10 minutes. My annual premium? Just around $400!

    [/vc_column_text][/vc_column][/vc_row]
    [vc_row css=”.vc_custom_section{padding-top: 60px !important; padding-bottom: 40px !important;}”][vc_column][vc_column_text]

    Why Every Home Business Owner Should Consider Coverage

    Here’s why I think every home business owner should seriously consider getting covered:

    [/vc_column_text][/vc_column][/vc_row]
    [vc_row css=”.vc_custom_benefit_section{padding-top: 20px !important; padding-bottom: 20px !important;}”][vc_column][vc_column_text]

    😅

    1. Oops Moments Happen

    Let’s say you’re delivering custom invitations to a client’s home and accidentally knock over their expensive vase while setting up samples. Or maybe someone claims your homemade soap caused a skin reaction.

    Life happens, and liability protection means you won’t be paying out of pocket for unexpected mishaps!

    [/vc_column_text][/vc_column][/vc_row]
    [vc_row css=”.vc_custom_benefit_section{padding-top: 20px !important; padding-bottom: 20px !important;}”][vc_column][vc_column_text]

    🎨

    2. Your Creative Space Matters

    Picture this: a kitchen fire damages your craft room where you store all your Cricut supplies, vinyl, and that beautiful new heat press you just bought.

    Property protection helps replace your business equipment and supplies so you can get back to creating without breaking the bank.

    [/vc_column_text][/vc_column][/vc_row]
    [vc_row css=”.vc_custom_benefit_section{padding-top: 20px !important; padding-bottom: 20px !important;}”][vc_column][vc_column_text]

    🏠

    3. When Life Interrupts Business

    Imagine your basement craft studio floods right before the busy holiday season when you usually make 60% of your annual income.

    Business interruption coverage can help replace that lost income while you’re getting your space back up and running.

    [/vc_column_text][/vc_column][/vc_row]
    [vc_row css=”.vc_custom_benefit_section{padding-top: 20px !important; padding-bottom: 20px !important;}”][vc_column][vc_column_text]

    🔒

    4. Protecting Your Hard Work

    Unfortunately, some not-so-nice people target home businesses – stealing packages from porches, breaking into home studios, or even taking equipment from craft show setups.

    Insurance helps you bounce back when theft tries to derail your dreams.

    [/vc_column_text][/vc_column][/vc_row]
    [vc_row css=”.vc_custom_benefit_section{padding-top: 20px !important; padding-bottom: 40px !important;}”][vc_column][vc_column_text]

    😴

    5. Sweet Dreams & Peace of Mind

    Running a business is already stressful enough without worrying about “what ifs.” Having insurance lets you focus on what you love – creating amazing products and serving your customers – instead of losing sleep over potential problems.

    Insurance is like giving yourself a safety net while you’re out there chasing your entrepreneurial dreams! 🎪

    [/vc_column_text][/vc_column][/vc_row]
    [vc_row css=”.vc_custom_conclusion_section{background: linear-gradient(135deg, #e8f5e8 0%, #d4edda 100%); padding-top: 50px !important; padding-bottom: 50px !important; border-radius: 25px !important; margin: 40px 0 !important;}”][vc_column][vc_column_text]

    The Bottom Line

    Getting insurance for your home business is like giving yourself a safety net while you’re out there chasing your entrepreneurial dreams! 🎪 It protects both your business assets AND your personal finances from unexpected curveballs.

    My advice?

    Chat with an insurance professional who understands small home businesses. They can help you figure out exactly what coverage makes sense for YOUR specific situation and budget.

    [/vc_column_text][/vc_column][/vc_row]
    [vc_row css=”.vc_custom_section{padding-top: 60px !important; padding-bottom: 40px !important;}”][vc_column][vc_column_text]

    You’ve Got This! 🚀

    Remember, investing in your business’s protection is just as important as investing in new equipment or marketing! You’ve got this, and insurance is just one more way to set yourself up for long-term success!

    [/vc_column_text][/vc_column][/vc_row]
    [vc_row css=”.vc_custom_cta_section{background: linear-gradient(135deg, #2c3e50 0%, #495057 100%); padding-top: 50px !important; padding-bottom: 50px !important; border-radius: 25px !important; color: #ffffff !important; text-align: center !important; margin: 40px 0 !important;}”][vc_column][vc_column_text]

    Let’s Keep the Conversation Going! 💌

    Have questions about business insurance or other aspects of running your home business? I love helping fellow entrepreneurs navigate this exciting journey!

    ✨ Your entrepreneurial journey matters • Let’s support each other • Success is sweeter when shared

    [/vc_column_text][/vc_column][/vc_row]

  • Sweet Dreams Start in Your Kitchen: Complete Cottage Food Guide

    [vc_row full_width=”stretch_row” css=”.vc_custom_hero{background: linear-gradient(135deg, #f8f9fa 0%, #e9ecef 50%, #dee2e6 100%); padding-top: 60px !important; padding-bottom: 80px !important; margin-top: -20px !important; position: relative;}”][vc_column][vc_column_text css=”.vc_custom_text{text-align: center; color: #2c3e50;}”]

    🏠Sweet Dreams Start in Your Kitchen

    The Complete Guide to Cottage Food Laws in All 50 States (Plus Territories!)

    Ready to turn your amazing homemade treats into a real business? Let’s dive into the deliciously legal world of cottage food laws across America!

    [/vc_column_text][/vc_column][/vc_row] [vc_row css=”.vc_custom_section{padding-top: 60px !important; padding-bottom: 40px !important;}”][vc_column][vc_column_text]

    🍪The Sweet Truth About Home Food Businesses

    Picture this: You’re known as the “cookie queen” among friends and family. Every potluck, every birthday party, every school event – people are practically begging you to bring your famous chocolate chip cookies or those incredible cinnamon rolls that disappear faster than you can say “batch number two.”

    Sound familiar?

    If you’ve ever thought, “Maybe I should actually sell these!” but then got overwhelmed by visions of complicated licenses, expensive commercial kitchens, and mountains of paperwork… I’ve got some seriously sweet news for you!

    🌟 What Are Cottage Food Laws?

    Think of cottage food laws as your state’s way of saying, “Hey, we know you make incredible food at home, and we want to help you share it with the world – safely and legally!” These special laws allow you to use your home kitchen, sell directly to customers, keep licensing simple, and start small while growing at your own pace.

    [/vc_column_text][/vc_column][/vc_row] [vc_row css=”.vc_custom_stats{background-color: #f8f9fa; padding-top: 60px !important; padding-bottom: 60px !important; border-radius: 20px !important;}”][vc_column][vc_column_text]

    📊Cottage Food Laws: By the Numbers

    [/vc_column_text][/vc_column][/vc_row] [vc_row][vc_column width=”1/5″][vc_column_text]
    47 States with cottage food programs
    [/vc_column_text][/vc_column][vc_column width=”1/5″][vc_column_text]
    23 States requiring no permit
    [/vc_column_text][/vc_column][vc_column width=”1/5″][vc_column_text]
    $250K Highest annual sales limit (Florida)
    [/vc_column_text][/vc_column][vc_column width=”1/5″][vc_column_text]
    15 States allowing online sales
    [/vc_column_text][/vc_column][vc_column width=”1/5″][vc_column_text]
    5 Locations with no programs
    [/vc_column_text][/vc_column][/vc_row] [vc_row css=”.vc_custom_directory{padding-top: 80px !important; padding-bottom: 60px !important;}”][vc_column][vc_column_text]

    🗺️Your Complete State-by-State Directory

    Every state (well, almost every state!) has different rules, limits, and requirements. Here’s your complete guide to cottage food laws across America:

    ⚠️ Important Note: Laws change! Always verify current requirements with your state’s official cottage food program before starting your business. This guide provides general information based on recent data.
    [/vc_column_text][/vc_column][/vc_row] [vc_row css=”.vc_custom_easy{background-color: #f8f9fa; padding-top: 60px !important; padding-bottom: 40px !important;}”][vc_column][vc_column_text]

    🌟 The “Easy Button” States

    These states make it super simple to get started:

    [/vc_column_text][/vc_column][/vc_row] [vc_row][vc_column width=”1/3″][vc_column_text]
    🌟

    Florida

    No Permit Required

    Sales Limit: $250,000/year

    Where to Sell: Direct to consumer, online (in-state)

    Contact: (850) 410-3800

    Label must include “Made in a Cottage Food Operation”

    [/vc_column_text][/vc_column][vc_column width=”1/3″][vc_column_text]
    🤠

    Texas

    No Permit Required

    Sales Limit: No limit

    Where to Sell: Direct to consumer, online (in-state)

    Contact: (512) 834-6626

    Food handler training required

    [/vc_column_text][/vc_column][vc_column width=”1/3″][vc_column_text]
    🏞️

    Arkansas

    No Permit Required

    Sales Limit: No limit

    Where to Sell: Direct to consumer, online

    Contact: (501) 661-2171

    No special requirements

    [/vc_column_text][/vc_column][/vc_row] [vc_row css=”.vc_custom_goldilocks{padding-top: 40px !important; padding-bottom: 40px !important;}”][vc_column][vc_column_text]

    ✨ The “Goldilocks” States

    Not too restrictive, not too loose – just right:

    [/vc_column_text][/vc_column][/vc_row] [vc_row][vc_column width=”1/3″][vc_column_text]
    🏔️

    Michigan

    No Permit Required

    Sales Limit: $25,000/year

    Where to Sell: Direct to consumer, online (in-state)

    Contact: (800) 292-3939

    Label must state “Made in a Home Kitchen”

    [/vc_column_text][/vc_column][vc_column width=”1/3″][vc_column_text]
    🏔️

    Colorado

    No Permit Required

    Sales Limit: $10,000/product

    Where to Sell: Direct to consumer

    Contact: (303) 692-3645

    Food safety course encouraged

    [/vc_column_text][/vc_column][vc_column width=”1/3″][vc_column_text]
    🦬

    Missouri

    No Permit Required

    Sales Limit: $50,000/year

    Where to Sell: Direct to consumer

    Contact: (573) 751-6090

    Label must state “Not Inspected”

    [/vc_column_text][/vc_column][/vc_row] [vc_row css=”.vc_custom_detailed{background-color: #f8f9fa; padding-top: 60px !important; padding-bottom: 40px !important;}”][vc_column][vc_column_text]

    📝 The “Dotted I’s and Crossed T’s” States

    A bit more paperwork, but totally doable:

    [/vc_column_text][/vc_column][/vc_row] [vc_row][vc_column width=”1/3″][vc_column_text]
    🌴

    California

    Class A or B Permit

    Sales Limit: $50K (A) / $150K (B)

    Where to Sell: A: Direct; B: Direct + wholesale

    Contact: fdbinfo@cdph.ca.gov

    Training required; Class B needs inspection

    [/vc_column_text][/vc_column][vc_column width=”1/3″][vc_column_text]
    🏖️

    New Jersey

    Permit Required

    Sales Limit: $50,000/year

    Where to Sell: Direct (farmers markets, events)

    Contact: CFO@doh.nj.gov

    Separate kitchen required; food safety training

    [/vc_column_text][/vc_column][vc_column width=”1/3″][vc_column_text]
    🏛️

    Virginia

    Permit Required

    Sales Limit: No limit

    Where to Sell: Direct to consumer

    Contact: (804) 786-3520

    Kitchen inspection required

    [/vc_column_text][/vc_column][/vc_row] [vc_row css=”.vc_custom_no_program{padding-top: 40px !important; padding-bottom: 40px !important;}”][vc_column][vc_column_text]

    ❌ The “Sorry, Not Sorry” Places

    These locations don’t currently have cottage food programs:

    [/vc_column_text][/vc_column][/vc_row] [vc_row][vc_column width=”1/3″][vc_column_text]
    🌺

    Hawaii

    No Program

    Requirement: Commercial kitchen for all food sales

    Contact: (808) 586-8000

    [/vc_column_text][/vc_column][vc_column width=”1/3″][vc_column_text]
    🏝️

    U.S. Virgin Islands

    No Program

    Requirement: Commercial kitchen required

    Contact: (340) 774-9000

    [/vc_column_text][/vc_column][vc_column width=”1/3″][vc_column_text]
    🏖️

    Other Territories

    No Programs

    Includes: Guam, American Samoa, Northern Mariana Islands

    Commercial kitchen requirements apply

    [/vc_column_text][/vc_column][/vc_row] [vc_row css=”.vc_custom_guide{background-color: #f8f9fa; padding-top: 80px !important; padding-bottom: 60px !important; border-radius: 20px !important;}”][vc_column][vc_column_text]

    🚀Your Next Steps to Sweet Success

    Step 1: Research Your State (30 minutes)

    • Find your state in the directory above
    • Visit the official government website for current requirements
    • Note any training or permit requirements
    • Check local zoning laws in your area

    Step 2: Perfect Your Products (1-2 weeks)

    • Choose 2-3 items to start with (don’t overwhelm yourself!)
    • Create consistent recipes with exact measurements
    • Test with friends and family for honest feedback
    • Calculate your costs and pricing

    Step 3: Handle the Legal Stuff (1-2 weeks)

    • Apply for any required permits or registrations
    • Complete required food safety training
    • Set up basic business tracking (income/expenses)
    • Create compliant labels with all necessary information

    Step 4: Find Your First Customers (Week 1)

    • Start with farmers markets or community events
    • Set up social media accounts for your new business
    • Tell everyone you know (word of mouth is golden!)
    • Consider online sales if your state allows them
    [/vc_column_text][/vc_column][/vc_row] [vc_row css=”.vc_custom_cta{padding-top: 60px !important; padding-bottom: 80px !important;}”][vc_column][vc_column_text]

    🎉Ready to Turn Your Kitchen Dreams Into Reality?

    The cottage food world is waiting for what you create. Your community needs your special touch, your family recipes, your creative twists on classic favorites.

    Remember: Every successful food business started with someone just like you, standing in their home kitchen, wondering “What if…?”

    Your “what if” moment is right now. Let’s make it happen! 🍪✨

    [/vc_column_text][/vc_column][/vc_row] [vc_row css=”.vc_custom_disclaimer{padding-top: 40px !important; padding-bottom: 40px !important;}”][vc_column][vc_column_text]

    📝Important Legal Disclaimer

    This information is for educational purposes only and should not be considered legal advice. Cottage food laws change regularly, and requirements vary by state and sometimes by local jurisdiction. Always verify current requirements with your state’s official cottage food program before starting your business.

    When in doubt, contact your state’s department of agriculture, health department, or consult with a local attorney familiar with food business regulations.

    Happy Baking (and Selling!),
    Marcia ❤️

    P.S. – If you found this helpful, share it with that friend who’s always talking about starting their food business “someday.” Today might just be their someday!

    [/vc_column_text][/vc_column][/vc_row] [vc_row][vc_column][vc_raw_html]JTNDc3R5bGUlM0UlMEEuY29udGVudC1jYXJkJTNBaG92ZXIlMjAlN0IlMEElMjAlMjAlMjAlMjB0cmFuc2Zvcm0lM0ElMjB0cmFuc2xhdGVZJTI4LTVweCUyOSUzQiUwQSUyMCUyMCUyMCUyMGJveC1zaGFkb3clM0ElMjAwJTIwMTBweCUyMDMwcHglMjByZ2JhJTI4MCUyQzAlMkMwJTJDMC4xMiUyOSUzQiUwQSU3RCUwQSUwQS5zdGF0ZS1jYXJkJTNBaG92ZXIlMjAlN0IlMEElMjAlMjAlMjAlMjB0cmFuc2Zvcm0lM0ElMjB0cmFuc2xhdGVZJTI4LTNweCUyOSUzQiUwQSUyMCUyMCUyMCUyMGJveC1zaGFkb3clM0ElMjAwJTIwMTJweCUyMDM1cHglMjByZ2JhJTI4MCUyQzAlMkMwJTJDMC4xNSUyOSUzQiUwQSU3RCUwQSUwQS5zZWN0aW9uLWNhcmQlM0Fob3ZlciUyMCU3QiUwQSUyMCUyMCUyMCUyMHRyYW5zZm9ybSUzQSUyMHRyYW5zbGF0ZVklMjgtM3B4JTI5JTNCJTBBJTIwJTIwJTIwJTIwYm94LXNoYWRvdyUzQSUyMDAlMjA4cHglMjAyNXB4JTIwcmdiYSUyODAlMkMwJTJDMCUyQzAuMTIlMjklM0IlMEElN0QlMEElM0MlMkZzdHlsZSUzRQ==[/vc_raw_html][/vc_column][/vc_row]
  • How to Price Cakes Profitably in 2026

    [vc_row full_width=”stretch_row” css=”.vc_custom_pricing_hero{background: linear-gradient(135deg, #f8f9fa 0%, #e9ecef 50%, #dee2e6 100%); padding-top: 80px !important; padding-bottom: 80px !important; text-align: center; border-radius: 30px !important; margin-bottom: 60px !important;}”][vc_column][vc_column_text]

    How to Price Cakes Profitably in 2025

    The complete guide to profitable cake pricing for home bakers and professional bakeries.

    Learn the proven formula that successful bakers use to price cakes accurately and maximize profits.

    [/vc_column_text][/vc_column][/vc_row]
    [vc_row css=”.vc_custom_section{padding-top: 60px !important; padding-bottom: 40px !important;}”][vc_column][vc_column_text]

    The Challenge of Profitable Cake Pricing

    Pricing cakes profitably is one of the biggest challenges for bakers in 2026. Many talented bakers undercharge for their work, leading to burnout and financial stress.

    The good news? Professional cake pricing doesn’t have to be complicated. With the right formula and tools, you can price confidently and build a profitable bakery business.

    Why Traditional Methods Fail

    In this comprehensive guide, we’ll cover everything you need to know about how to price cakes. You’ll learn the exact strategies used by successful bakers worldwide.

    [/vc_column_text][/vc_column][/vc_row]
    [vc_row css=”.vc_custom_problem_section{padding-top: 60px !important; padding-bottom: 60px !important;}”][vc_column][vc_column_text]

    🚨 The Problem With Traditional Cake Pricing Methods

    Most bakers rely on outdated pricing methods that leave money on the table. These approaches often lead to inconsistent pricing and customer confusion.

    It’s time to upgrade to professional pricing strategies that actually work in 2025.

    [/vc_column_text][vc_row_inner][vc_column_inner width=”1/2″][vc_column_text]

    😰

    Common Pricing Mistakes

    • Guessing prices based on “what feels right”
    • Copying competitor prices without understanding costs
    • Not tracking actual ingredient costs
    • Forgetting to value your time properly
    • Not including overhead costs in calculations

    [/vc_column_text][/vc_column_inner][vc_column_inner width=”1/2″][vc_column_text]

    Professional Pricing Benefits

    • Consistent profits on every single cake
    • Confidence when quoting prices to customers
    • Automatic price adjustments when costs change
    • Professional image that attracts better clients
    • Scalable system that grows with your business

    [/vc_column_text][/vc_column_inner][/vc_row_inner][/vc_column][/vc_row]
    [vc_row css=”.vc_custom_formula_section{background: #f8f9fa; padding-top: 80px !important; padding-bottom: 80px !important; border-radius: 30px !important; margin: 60px 0 !important;}” anchor=”formula”][vc_column][vc_column_text]

    🧮 The Professional Cake Pricing Formula

    This is the exact formula successful bakers use to price cakes profitably. It ensures you never lose money on an order again.

    📐 The Profitable Cake Pricing Formula

    Cake Price = (Ingredient Costs + Labor Costs + Overhead) × Profit Margin

    This formula ensures every cake is priced for profitability and scales perfectly as your business grows.

    [/vc_column_text][/vc_column][/vc_row]
    [vc_row css=”.vc_custom_section{padding-top: 60px !important; padding-bottom: 40px !important;}”][vc_column][vc_column_text]

    🔍 Breaking Down Each Component

    Let’s examine each part of the pricing formula in detail. We’ll show you exactly how to calculate each component.

    [/vc_column_text][vc_row_inner][vc_column_inner width=”1/4″][vc_column_text]

    🥄

    1. Ingredient Costs

    Calculate the exact cost of every ingredient used in your recipe. Include flour, sugar, eggs, butter, and all decorating materials.

    Pro Tip: Track costs per gram or ounce for maximum accuracy. Update prices monthly as ingredient costs fluctuate.

    [/vc_column_text][/vc_column_inner][vc_column_inner width=”1/4″][vc_column_text]

    2. Labor Costs

    Track every minute spent on the cake including planning, shopping, baking, decorating, and cleanup. Multiply by your desired hourly rate.

    Important: Pay yourself at least minimum wage. Experienced bakers should charge $15-$50+ per hour.

    [/vc_column_text][/vc_column_inner][vc_column_inner width=”1/4″][vc_column_text]

    💰

    3. Overhead Costs

    Include utilities, equipment depreciation, packaging, and business expenses. Calculate this as a percentage of your total costs.

    Rule of Thumb: Overhead typically ranges from 10-25% of ingredient and labor costs combined.

    [/vc_column_text][/vc_column_inner][vc_column_inner width=”1/4″][vc_column_text]

    📈

    4. Profit Margin

    Apply a profit margin to ensure business growth and sustainability. This should be at least 20-50% depending on your market.

    Strategy: Start with 30% profit margin and adjust based on demand. Premium designs can support higher margins.

    [/vc_column_text][/vc_column_inner][/vc_row_inner][/vc_column][/vc_row]
    [vc_row css=”.vc_custom_example_section{background: linear-gradient(135deg, #fff3cd 0%, #ffeaa7 100%); padding-top: 60px !important; padding-bottom: 60px !important; border-radius: 25px !important; margin: 60px 0 !important;}”][vc_column][vc_column_text]

    📊 Real Cake Pricing Example

    See the professional pricing formula in action with a real cake order. Learn how to apply these principles to your own baking business.

    🎂 Example: 8-inch Chocolate Birthday Cake

    Step-by-Step Calculation

    This systematic approach ensures profitability while remaining competitive. Customers appreciate transparent, professional pricing.

    [/vc_column_text][vc_row_inner][vc_column_inner width=”1/4″][vc_column_text]

    💵 Ingredient Costs

    Flour, sugar, cocoa: $3.50
    Eggs, butter, milk: $4.25
    Frosting ingredients: $2.75
    Decorations: $1.50
    Total: $12.00

    [/vc_column_text][/vc_column_inner][vc_column_inner width=”1/4″][vc_column_text]

    ⏱️ Labor Costs

    Planning & shopping: 0.5 hrs
    Baking & cooling: 2 hrs
    Decorating: 1.5 hrs
    4 hours × $20/hr
    Total: $80.00

    [/vc_column_text][/vc_column_inner][vc_column_inner width=”1/4″][vc_column_text]

    🏢 Overhead Costs

    15% of ingredient + labor
    ($12 + $80) × 15%
    Total: $13.80

    [/vc_column_text][/vc_column_inner][vc_column_inner width=”1/4″][vc_column_text]

    📈 Final Calculation

    Base cost: $105.80
    30% profit margin
    $105.80 × 1.30
    Final Price: $137.54

    [/vc_column_text][/vc_column_inner][/vc_row_inner][vc_column_text]

    Professional Pricing Benefits

    This approach guarantees profitability on every order and builds customer trust through transparent pricing structure.

    [/vc_column_text][/vc_column][/vc_row]
    [vc_row css=”.vc_custom_section{padding-top: 60px !important; padding-bottom: 40px !important;}”][vc_column][vc_column_text]

    🛠️ Essential Tools for Cake Pricing

    The right tools make accurate cake pricing simple and efficient. Professional bakers rely on these resources to maintain consistent profitability.

    [/vc_column_text][vc_row_inner][vc_column_inner width=”1/3″][vc_column_text]

    📊

    Spreadsheet Templates

    Basic Excel or Google Sheets templates for ingredient tracking. Requires manual updates when prices change.

    ⭐⭐⭐ Good for beginners

    [/vc_column_text][/vc_column_inner][vc_column_inner width=”1/3″][vc_column_text]

    🧮

    Online Calculators

    Free online tools for quick calculations. Useful for one-off pricing but lack recipe storage features.

    ⭐⭐⭐⭐ Good for occasional use

    [/vc_column_text][/vc_column_inner][vc_column_inner width=”1/3″][vc_column_text]

    🚀

    Professional Software

    Automated pricing tools with recipe storage and customer quotes. Updates all prices automatically when ingredients change.

    ⭐⭐⭐⭐⭐ Best for serious bakers

    [/vc_column_text][/vc_column_inner][/vc_row_inner][/vc_column][/vc_row]
    [vc_row css=”.vc_custom_section{padding-top: 60px !important; padding-bottom: 40px !important;}”][vc_column][vc_column_text]

    💡 Advanced Cake Pricing Strategies

    Take your pricing to the next level with these professional strategies. These techniques help established bakers maximize profits and attract premium clients.

    [/vc_column_text][vc_row_inner][vc_column_inner width=”1/4″][vc_column_text]

    🎯

    Value-Based Pricing

    Price based on the value you deliver, not just costs. Wedding cakes and special occasions command premium prices.

    Example: Anniversary cakes can be priced 30-50% higher than regular birthday cakes due to their emotional significance.

    [/vc_column_text][/vc_column_inner][vc_column_inner width=”1/4″][vc_column_text]

    🏆

    Tiered Pricing Structure

    Offer good, better, best options to appeal to different budgets. This often increases average order value.

    Strategy: Basic design, premium decoration, luxury presentation. Customers often choose the middle option, increasing profits.

    [/vc_column_text][/vc_column_inner][vc_column_inner width=”1/4″][vc_column_text]

    📅

    Rush Order Pricing

    Charge premium rates for last-minute orders. This compensates for schedule disruption and prioritization.

    Standard Rates: 25% surcharge for orders within 48 hours, 50% for same-day orders. Communicate these policies clearly upfront.

    [/vc_column_text][/vc_column_inner][vc_column_inner width=”1/4″][vc_column_text]

    📦

    Package Deal Pricing

    Bundle related services for higher overall revenue. Packages simplify customer decision-making while increasing profits.

    Examples: Cake + cupcakes, birthday party packages, or seasonal promotion bundles. Include delivery and setup for premium packages.

    [/vc_column_text][/vc_column_inner][/vc_row_inner][/vc_column][/vc_row]
    [vc_row css=”.vc_custom_faq_section{padding-top: 80px !important; padding-bottom: 60px !important;}”][vc_column][vc_column_text]

    ❓ How to Price Cakes – Frequently Asked Questions

    Essential Pricing Questions

    These common questions help clarify professional cake pricing strategies. Understanding these concepts ensures consistent profitability in your baking business.

    [/vc_column_text][vc_row_inner][vc_column_inner width=”1/2″][vc_column_text]

    Q: How much should I charge per hour for cake decorating?
    A: Professional bakers typically charge $15-$50 per hour depending on experience and market. Specialized techniques like fondant work or sugar flowers command higher rates. Start with your local minimum wage and increase as you gain experience and skills.
    Q: What’s the average profit margin for custom cakes?
    A: Successful bakeries maintain 30-50% profit margins on custom cakes. Wedding cakes and specialty designs can support higher margins due to their premium nature. Start with 30% and adjust based on your market and demand.
    Q: How do I calculate ingredient costs accurately?
    A: Break down each ingredient to cost per gram, ounce, or unit used. Use a kitchen scale for precise measurements and track wholesale prices monthly. Digital pricing tools automate this process and update costs automatically.
    Q: Should I charge differently for pickup vs delivery?
    A: Yes, always include delivery costs in your pricing structure. Calculate mileage, time, and gas expenses. Many bakers charge $0.50-$1.00 per mile plus a base delivery fee to cover time and vehicle wear.

    [/vc_column_text][/vc_column_inner][vc_column_inner width=”1/2″][vc_column_text]

    Q: How do I handle customers who think my prices are too high?
    A: Educate customers about the value and quality you provide. Show behind-the-scenes content and explain your process. Professional pricing attracts customers who value quality over low cost. Confident pricing reflects professional expertise.
    Q: What overhead costs should I include in cake pricing?
    A: Include utilities, equipment depreciation, packaging, business insurance, and marketing costs. Calculate overhead as 10-25% of your ingredient and labor costs. Don’t forget about licenses, permits, and professional development expenses.
    Q: How often should I update my cake prices?
    A: Review prices quarterly and adjust when ingredient costs change significantly. Annual price increases of 3-5% help offset inflation and business growth costs. Communicate changes to regular customers in advance with professional notifications.
    Q: Can I use the same pricing formula for cupcakes and cookies?
    A: Yes, the basic formula applies to all baked goods. However, factor in the additional labor for individual decoration and packaging. Consider minimum order quantities for smaller items to ensure profitability on time investment.

    [/vc_column_text][/vc_column_inner][/vc_row_inner][/vc_column][/vc_row]
    [vc_row css=”.vc_custom_final_cta{background: linear-gradient(135deg, #2c3e50 0%, #495057 100%); padding-top: 80px !important; padding-bottom: 80px !important; border-radius: 25px !important; color: #ffffff !important; text-align: center !important; margin: 60px 0 !important;}”][vc_column][vc_column_text]

    Ready to Price Your Cakes Profitably?

    Stop undercharging for your beautiful cakes and start building a profitable bakery business.

    Join hundreds of bakers who’ve transformed their pricing with professional tools and strategies.

    ✨ Free 7-day trial • No credit card required • Professional results guaranteed

    [/vc_column_text][/vc_column][/vc_row]

  • How to Start a Cottage Food Business in 2026: Legal, Financial, and Kitchen Setup Steps for Home Bakers

    When I baked my first paid order out of my home kitchen in Beachwood, NJ, I had no idea what I was doing on the business side. I knew my cakes were good. I had no idea whether I was allowed to sell them from my house, whether I needed a permit, or whether I was charging enough to actually make any money.

    Nobody handed me a roadmap. I figured it out the hard way — through hours of Google searches, a few phone calls to my county health department, and a lot of expensive mistakes on the pricing side.

    This guide is the roadmap I wish I’d had.

    It covers the four things every home baker needs to get in place before — or right as — they start taking paid orders: the legal foundation, the financial setup, the physical kitchen and equipment systems, and the basic marketing presence. I’ve updated everything for 2026, and I’ve replaced all the generic business advice with specifics that actually apply to cottage food businesses and home bakeries.

    Work through it in phases. You don’t have to do everything at once. But by the time you finish all four phases, you’ll have a real business — not just a hobby that occasionally makes money.


    Your 30-Day Home Bakery Launch Checklist

    Here’s a quick overview of the four phases. Each one is broken down in detail below.

    • Phase 1 (Days 1–7): Legal foundation — cottage food laws, permits, business registration, labeling
    • Phase 2 (Days 8–14): Financial setup — pricing, separate bank account, expense tracking, tax basics
    • Phase 3 (Days 15–21): Kitchen and equipment setup — workspace organization, food safety, equipment inventory
    • Phase 4 (Days 22–30): Marketing foundation — Instagram presence, custom cake page, order process

    Let’s go through each one.


    Phase 1: The Legal Foundation for Your Cottage Food Business (Days 1–7)

    Home baker reviewing cottage food law requirements at a kitchen table with a laptop and notepad
    Understanding your state’s cottage food laws is the first step before taking any paid orders.

    I know. Legal stuff is not why you got into baking. But this is the one area where skipping steps can actually cost you — not just fines or permit issues, but the stress of building something on a shaky foundation. Getting this right upfront takes less time than you think, and most of it comes down to understanding three things: what your state allows, what permits you need, and how to label your products correctly.

    Step 1: Look Up Your State’s Cottage Food Laws

    Cottage food laws are the state-level rules that determine what home bakers can legally produce and sell. They vary significantly from state to state. Some states are very permissive — they let you sell almost anything non-perishable, direct to consumers, with minimal registration. Others have strict sales caps, product restrictions, or require home kitchen inspections before you can take your first order.

    Before you do anything else, you need to know what your state actually allows. Key questions to answer:

    • What foods are permitted under cottage food law in your state? (Usually shelf-stable baked goods — cookies, cakes, breads — but not products that require refrigeration)
    • Where can you legally sell? (Direct to consumer only? Farmers markets? Online with shipping?)
    • Is there an annual gross sales cap you can’t exceed?
    • Are home kitchen inspections required?
    • Do you need to register with your county health department or state agriculture department?

    We’ve done the research across all 50 states so you don’t have to start from scratch. Check the SweetTube Academy Complete Cottage Food Laws Directory for your state’s current rules, including 2026 updates.

    Step 2: Obtain the Permits and Licenses Your State Requires

    Depending on your state and county, you may need one or more of the following:

    • Cottage food registration or permit — Many states require you to register with your local health department or county clerk. This is usually a simple form and a small fee (typically $25–$100). Some counties also conduct a brief home kitchen inspection to verify basic food safety compliance.
    • Food handler’s permit or food safety certification — Some states require at least one person in the business to hold a food handler’s card or complete a food safety course. ServSafe is the most widely accepted certification. Even where it’s not required, it’s worth having — it protects you and your customers.
    • Business license or DBA (“Doing Business As”) registration — If you’re selling under a business name (rather than your legal name), most counties require a DBA registration. This is also where you decide your business structure — sole proprietor is the simplest starting point for most home bakers.
    • Home occupation permit — Some municipalities require this if you’re running any business out of your home. Check with your local zoning office.

    Don’t be intimidated by this list. For most home bakers, the full legal setup involves registering with one office, paying a small fee, and completing one or two short forms. Call your county health department — in my experience, they’re usually genuinely helpful to home food businesses.

    Step 3: Understand Home Kitchen Inspection Requirements

    Some states and counties require a home kitchen inspection before you can legally sell. This is not as scary as it sounds. Inspectors are typically checking that you have:

    • A clean, functional kitchen with working refrigeration and adequate handwashing facilities
    • Proper food storage (ingredients stored off the floor, away from cleaning products)
    • A pet-free cooking space during production (many states require this)
    • No signs of pest activity

    Even if your state doesn’t require an inspection, it’s a good idea to run through this mental checklist before your first order. These are food safety basics that protect your customers — and you.

    Step 4: Set Up Proper Product Labeling

    Most cottage food states require every product you sell to carry a label. Required information typically includes:

    • Product name
    • Your name and home address (or business address)
    • Ingredients in descending order by weight
    • Net weight or count
    • Allergen disclosure — nuts, dairy, eggs, gluten, soy (check your state’s requirements)
    • A cottage food disclosure statement (exact wording varies by state, but it typically reads something like: “Made in a home kitchen not inspected by [state agency].”)

    You can create professional-looking labels affordably using Canva. Start with a simple design and make it match your brand. Consistent packaging makes a real impression on customers.

    Phase 1 Checklist

    • ☐ Researched my state’s cottage food laws (see the Cottage Food Laws Directory)
    • ☐ Identified all required permits and licenses for my county
    • ☐ Completed business registration or DBA (if applicable)
    • ☐ Obtained food handler’s permit or food safety certification (if required)
    • ☐ Scheduled or completed home kitchen inspection (if required)
    • ☐ Created compliant product labels with all required information

    Phase 2: Financial Setup for Your Home Bakery (Days 8–14)

    Home baker using a laptop to calculate cake pricing with ingredient costs spread on the kitchen counter
    Pricing your baked goods correctly from day one is one of the most important things you can do for long-term profitability.

    The most common financial mistake I see home bakers make is undercharging — and I made it too. For the first year, I priced based on what “felt fair” or what I thought customers would pay. I had no idea whether I was actually making money after ingredient costs, my time, and overhead. Spoiler: I wasn’t, at least not on everything.

    Getting your financial foundation right early saves you from having to raise prices dramatically later (which is awkward with existing customers) and from the slow burn of working hard without building anything financially meaningful.

    Step 1: Open a Dedicated Business Checking Account

    This is the single most important financial step you can take as a new home baker. Open a separate bank account for your baking business — one that only receives business income and only pays business expenses.

    Why it matters:

    • At tax time, you’ll have a clean record of all income and expenses without sorting through personal transactions
    • It gives you a clearer picture of whether your business is actually profitable
    • It’s required for certain business structures (and strongly recommended for all of them)
    • It looks more professional if you’re accepting payments via Venmo Business, PayPal, or Square

    You don’t need a fancy business account. Many online banks and credit unions offer free business checking. Just make sure it’s kept completely separate from your personal finances.

    Step 2: Learn to Price Your Baked Goods Correctly

    Pricing is the area where most home bakers struggle most — and where getting it wrong hurts the most. There’s a formula that works, and it’s not complicated once you understand it:

    Price = Ingredient Cost + Packaging Cost + Labor Cost + Overhead + Profit Margin

    Breaking that down:

    • Ingredient cost: What did every ingredient in this specific product actually cost? Not a guess — actual per-recipe cost based on what you paid. This requires tracking what you buy and calculating your per-unit ingredient costs.
    • Packaging cost: Boxes, stickers, tissue paper, ribbon. These add up and need to be in your price.
    • Labor: Your time has value. Calculate how many hours a product takes from prep to delivery, and pay yourself a real hourly rate. Most experienced home bakers charge $15–$25/hour minimum for their labor.
    • Overhead: Your share of electricity, gas, oven wear, mixer wear, cleaning supplies. A simple way to start: add 10–15% on top of ingredient and labor costs.
    • Profit margin: The money that stays in the business after all costs. You need this to reinvest, cover slow months, and eventually grow.

    If you’re doing this math manually in a spreadsheet, it works — but it takes time. Try the SweetTube Academy pricing calculator to run the numbers faster, or consider BatterSuite, which is built specifically for home and cottage food bakers and handles ingredient costing, recipe pricing, and order management in one place.

    Step 3: Track Every Ingredient and Supply Purchase

    From the day you open your business account, keep records of every purchase related to your baking business. This means:

    • Grocery runs for baking ingredients (keep receipts, or use a dedicated card)
    • Packaging supplies, boxes, labels, ribbon
    • Equipment purchases (mixer attachments, pans, piping bags)
    • Website costs, marketing costs, software subscriptions
    • Mileage for business-related driving (farmers market, supply runs)

    These are all potential tax deductions. A shoebox of receipts works for a while, but you’ll save yourself a lot of stress at tax time if you use even a simple system — a spreadsheet with categories, or a tool like BatterSuite that logs expenses as you go.

    Step 4: Understand Your Tax Obligations as a Home Baker

    As a self-employed cottage food business owner, your tax situation is different from a W-2 employee. Key things to know:

    • Self-employment tax: You owe both the employer and employee portion of Social Security and Medicare taxes (currently 15.3% combined). This comes as a shock to many new business owners. Plan for it.
    • Quarterly estimated taxes: If you expect to owe more than $1,000 in taxes for the year, the IRS expects you to pay quarterly estimated taxes (due in April, June, September, and January). Your state likely has similar requirements.
    • Business expense deductions: The good news — all those legitimate business expenses you’re tracking reduce your taxable income. Ingredients, packaging, equipment, a portion of your home utility costs, business insurance, software — all potentially deductible.
    • Sales tax: Whether you need to collect and remit sales tax on baked goods depends on your state. Many states exempt basic food items but tax “luxury” items. Check your state’s rules.

    Consult a tax professional or CPA who works with small businesses for your first year if you’re unsure. The cost is worth it.

    Phase 2 Checklist

    • ☐ Opened a dedicated business checking account
    • ☐ Calculated actual ingredient costs for my core products
    • ☐ Set prices using the full cost formula (ingredients + packaging + labor + overhead + profit)
    • ☐ Set up a system for tracking income and expenses
    • ☐ Understood my quarterly estimated tax obligations
    • ☐ Checked my state’s sales tax rules for baked goods

    Phase 3: Kitchen and Equipment Setup for a Home Bakery (Days 15–21)

    Organized home bakery kitchen with labeled ingredient containers, baking equipment on shelves, and a clean prep workspace
    A well-organized home kitchen workspace reduces stress, speeds up production, and supports food safety compliance.

    Your home kitchen is your production facility. The more organized and efficient it is, the faster you work, the fewer mistakes you make, and the less burned out you feel after a busy weekend of orders. This phase is about setting up your workspace to support you — not fight you.

    Step 1: Designate a Dedicated Baking Zone

    If your kitchen can accommodate it, designate a specific area for baking production. This might be a countertop section, a kitchen island, or even a dedicated rolling cart. The goal is to have a workspace that’s:

    • Clear of personal clutter when you’re in production mode
    • Close to your key equipment (stand mixer, oven, refrigerator)
    • Easy to sanitize before and after each baking session

    Even if your kitchen is small, having a mental and physical “baking zone” helps you shift into production mode and keeps your business separate from everyday home life.

    Step 2: Get Your Food Safety Basics in Place

    Regardless of what your state requires for inspections, these food safety practices are non-negotiable when you’re selling food to customers:

    • Handwashing: Wash hands thoroughly before every production session and after handling raw eggs, touching your face, or handling anything non-food-related.
    • Surface sanitation: Clean and sanitize all prep surfaces before use. Keep a spray bottle of food-safe sanitizer solution at your workstation.
    • Ingredient storage: Store all ingredients in sealed containers, off the floor, away from cleaning products. Label everything with purchase dates and “use by” dates.
    • Allergen separation: If you work with common allergens (nuts, gluten, dairy), have a system for preventing cross-contact when producing allergen-free items for customers who need them.
    • Pet separation: Keep pets out of the kitchen during all production. Most cottage food laws require this, and it’s a basic sanitation requirement regardless.
    • Temperature control: Products requiring refrigeration must be kept below 41°F until delivery. Use a refrigerator thermometer to verify.

    Step 3: Build Your Equipment Inventory

    You don’t need commercial-grade equipment to run a profitable home bakery — but you do need reliable equipment, and you need to know what you have, what it’s worth, and when it needs to be replaced or serviced.

    Start by making a complete inventory of all equipment you use for your baking business:

    • Stand mixer (brand, model, purchase price, purchase date)
    • Oven — your regular home oven counts; note if it runs hot or cold
    • Baking pans, cake rings, springform pans
    • Decorating tools — turntable, piping bags, tips, bench scraper, smoother
    • Packaging supplies and equipment
    • Scale (critical for accurate ingredient costing and recipe consistency)
    • Thermometers — oven thermometer, instant-read for sugar work

    Why does this matter? Your equipment is a business asset. Tracking it properly lets you:

    • Claim depreciation on your taxes
    • Know when to budget for replacements
    • Calculate true overhead costs for your pricing
    • Have documentation for insurance purposes

    If you’re managing multiple pieces of equipment and want a simple system to track them, IcingVault is designed specifically for home and cottage food bakers to log, track, and manage bakery equipment inventory without needing a spreadsheet or general-purpose inventory app.

    Step 4: Set Up Production Systems

    As your order volume grows, you need repeatable systems that let you produce consistently without reinventing the wheel every time. Start building these habits now:

    • Standardize your recipes: Write down every recipe in a consistent format with exact weights (grams, not cups — scales are more accurate). This is the only way to guarantee consistent results and accurate ingredient costing.
    • Create a production schedule template: Map out what needs to happen when for each type of order. Custom cakes often require baking 2 days before, ganache or crumb coat the day before, final decoration the morning of. Build this into your order intake process.
    • Build a standard ingredient order list: Know what you need to restock weekly and set a regular shopping schedule. Running out of powdered sugar the day before a big order is a preventable problem.

    Phase 3 Checklist

    • ☐ Designated a dedicated baking zone in my kitchen
    • ☐ Set up food safety basics (sanitation supplies, allergen protocols, pet exclusion)
    • ☐ Created a complete equipment inventory with purchase dates and values
    • ☐ Standardized my core recipes by weight
    • ☐ Created a basic production schedule template for my most common orders
    • ☐ Established a regular ingredient restocking routine

    Phase 4: Marketing Foundation for Your Home Bakery (Days 22–30)

    Home baker photographing a custom decorated cake on a white marble surface for Instagram
    Strong product photography and a consistent Instagram presence are the most effective marketing tools for most home bakers.

    Marketing doesn’t have to be complicated or expensive when you’re starting out. Most home bakers get their first customers through word of mouth and Instagram — and those two channels can sustain a very healthy order volume if you do them well. This phase is about getting the basics in place so new customers can find you, understand what you do, and easily place an order.

    Step 1: Set Up Your Instagram for Business

    Instagram is still the most effective platform for most home and cottage food bakers. It’s visual, it’s where your customers spend time, and it allows you to build an audience without paying for advertising — at least in the early stages.

    Getting set up right:

    • Switch to a Professional (Business) account: This gives you access to insights, the ability to add a contact button, and the option to run ads later.
    • Write a clear bio: Tell people exactly what you do, where you’re located (city/area), and how to order. Example: “Custom cakes + baked goods | Beachwood, NJ | DM to order | Link below for order form”
    • Add a link to your order form or website: Don’t make customers hunt for how to reach you. Put your order form link or email directly in the bio.
    • Post your best work first: Your first 9–12 posts are your portfolio grid. Start with your strongest photos before posting anything else.

    For photography: You don’t need a professional camera. Natural light + a clean, simple background (white marble contact paper on a table or cutting board works great) + your phone camera produces professional-looking photos. Consistency matters more than perfection.

    Step 2: Create a Simple Product or Custom Cake Page

    If you have a website (even a simple one on WordPress, Squarespace, or a free builder), create a dedicated page for your custom cake or signature product offerings. This page should include:

    • Your best product photos
    • What you offer (flavors, sizes, customization options)
    • Your general pricing or a price range (or a link to your pricing calculator/quote request form)
    • Your order lead time (how far in advance customers need to order)
    • Your service area (local pickup only? Delivery radius?)
    • A clear call to action — a link to your order form or contact page

    If you don’t have a website yet, a well-organized Instagram profile with a link to a simple Google Form for order requests is enough to get started. Don’t let the absence of a website stop you from taking orders.

    Step 3: Set Up an Order Intake System

    Before you advertise, make sure you have a clear process for receiving and confirming orders. Nothing damages a new bakery’s reputation faster than communication chaos — missed orders, unclear expectations, last-minute surprises.

    At minimum, your order intake process should capture:

    • Customer name and contact information
    • Product type, size, flavor, and any customization details
    • Delivery or pickup date and time
    • Delivery address (if applicable)
    • Allergen information (does the customer or anyone in their household have known allergies?)
    • Deposit amount and payment method

    A Google Form that populates a spreadsheet is a perfectly functional starting point. For home bakers who want something purpose-built, BatterSuite includes order management with all of these fields built in, along with automatic cost calculations so you know your margin on every order.

    Step 4: Collect and Display Reviews Early

    Social proof matters enormously for home bakery marketing — especially when you’re new and potential customers don’t have a long track record to evaluate you on. For every order you complete in your first month:

    • Ask the customer for a photo of the product at the event or occasion
    • Follow up the day after delivery to ask if they were happy and request a Google review or a Facebook recommendation
    • Re-share customer photos on your Instagram (with permission)

    Five genuine five-star Google reviews can do more for your business than a hundred Instagram followers. Ask for them early and often.

    Step 5: Join the SweetTube Academy Community

    Running a home bakery can feel isolating — especially in the early days when you’re figuring everything out. Connecting with other bakers who are in the same stage (or a few steps ahead) accelerates your learning and keeps you motivated.

    Join the Sweet Academy community to connect with home and cottage food bakers, get feedback on pricing and marketing questions, and access the growing library of templates, guides, and tools — including everything covered in this post.

    Phase 4 Checklist

    • ☐ Set up Instagram Business profile with complete bio and order link
    • ☐ Posted first 9–12 product photos
    • ☐ Created a product or custom cake page on website (or a clear Instagram highlights section)
    • ☐ Set up an order intake form with all required fields
    • ☐ Established a deposit and payment policy
    • ☐ Asked first customers for reviews and social sharing
    • ☐ Joined the SweetTube Academy community

    You Don’t Have to Figure This Out Alone

    Starting a cottage food business is genuinely exciting — but it can also feel overwhelming when you’re staring at all the pieces at once. Legal requirements, pricing formulas, food safety protocols, Instagram strategy — it’s a lot to hold in your head.

    Here’s what I want you to take away from this guide: you don’t have to do it all perfectly right away. Work through these four phases in order. Check off the items as you complete them. Build the foundation before you focus on the growth.

    And use the tools that are built to help you:

    When I look back on my first year as a home baker, I don’t wish I’d baked better. I wish I’d run the business side more intentionally from the start. This guide is your chance to do exactly that.

    Now go bake something beautiful.

    — Marcia


    More Resources for Home Bakers